 Tel:
Tel:  Email:
  WhatsApp:
 Description
In-Depth Product Introduction
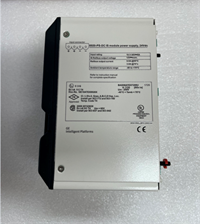
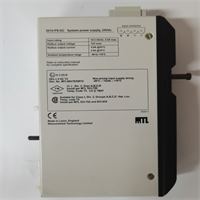
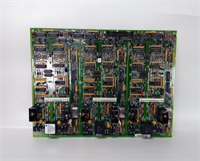
The GE 845-EP5H5G5HNNAANAAPTA3ACNB4 is a high-end Programmable Automation Controller from General Electric’s PACSystems RX3i series. On the industrial floor, it primarily serves as the “brain” of the entire control system, responsible for executing complex logic operations, data processing, and communication coordination between multiple devices.Honestly, the biggest fear in an automation system is the “brain” going on strike. With its large 32MB operating memory and strong multi-protocol support capabilities (including Ethernet, Profibus, and dual serial ports), this CPU module plays a critical role in power generation, water treatment, and manufacturing production lines. For maintenance engineers, having such a strictly tested original CPU on hand means being able to rapidly restore production during sudden failures, avoiding the huge economic losses caused by prolonged downtime. Its stability and expandability are the cornerstones of ensuring the continuous operation of the entire production line.
Key Technical Specifications
- Processor Type: 32-bit Power Architecture
- Operating Memory: 32 MB DRAM
- Non-volatile Memory: 128 MB Flash
- Ethernet Interface: 1x 10/100 Mbps (RJ45)
- Fieldbus Interface: 1x Profibus DP Master Interface
- Serial Interface: 2x (RS-232/485 configurable)
- Communication Protocols: Modbus TCP/IP, Profibus DP, Serial Modbus
- Program Scan Time: 0.02 ms per K logic instruction
- Operating Temperature: 0°C to 60°C
- Protection Rating: IP20
Installation and Wiring Guide
Replacing a CPU module involves the core control program, so extra caution is required. Please strictly follow the process below to ensure everything goes smoothly.Phase 1: Preparation (Estimated time: 30 minutes)
- Program Backup: Before removing the old module, be sure to completely back up the current project program, configuration files, and firmware version to your computer via the programming software (such as Proficy Machine Edition).
- Tool Preparation: Prepare an anti-static wrist strap, a flat-head screwdriver, a laptop, and serial/Ethernet communication cables.
- Safety Confirmation: Perform the Lockout/Tagout (LOTO) procedure and cut off the cabinet’s main power supply to prevent damage to the module from hot-swapping.
Phase 2: Removing the Old Module (Estimated time: 20 minutes)
- Cable Marking: Make physical marks on all communication cables (Ethernet, Profibus, Serial) connected to the CPU, noting which port they are plugged into.
- Disconnect: Gently unplug all connecting cables and coil them aside.
- Remove Module: Loosen the fixing clips or screws on both sides of the CPU module, and smoothly pull it horizontally out of the rack rail.
Phase 3: Installing the New Module (Estimated time: 30 minutes)
- ESD Protection: Put on an anti-static wrist strap and take the new 845-EP5H5G5HNNAANAAPTA3ACNB4 module out of the anti-static bag.
- Configuration Replication: Check the DIP switches on the new module (if any) to ensure they match the old module’s settings exactly.
- Insert into Rack: Align the new module with the rack rail, push it in horizontally until you hear a “click”, ensuring tight contact with the backplane connector.
- Restore Wiring: Based on your previous markings, accurately plug all communication cables back into their corresponding ports and tighten the connector screws.
Phase 4: Power-On Testing (Estimated time: 60 minutes)
- Power-On Self-Test: Close the switch to supply power and observe the CPU panel indicator lights. The RUN light should be blinking or solid, the OK light should be solid green, and there should be no red FLT (Fault) alarm.
- Program Download: Connect to the CPU using the programming software and verify if the firmware version matches. If it doesn’t match, you must upgrade/downgrade the firmware first, then download the previously backed-up program to the new CPU.
- Function Verification: After a successful program download, switch the CPU to RUN mode, monitor the communication status of each I/O module, and test if the key control logic executes normally.
Technical Pitfall Guide
- Firmware Version Trap: The RX3i series is extremely sensitive to firmware versions. The new module’s firmware must match the old module, otherwise, the program may fail to download or run abnormally. Never just power it on and download the program—read the version number first!
- Battery and Clock: If the old module has a battery pack, remember to migrate the battery pack and Real-Time Clock (RTC) data over, otherwise the new module will lose its program and time after a power outage.
- IP Address Conflict: Before downloading the program, confirm that the new CPU’s IP address has been set to avoid communication interruptions caused by conflicts with other devices on the network.