

 Tel:
Tel:  Email:
  WhatsApp:
 Description
Key Technical Specifications
| Parameter | Specification | Field Note |
|---|---|---|
| Rated Flow | 63 LPM | At rated pressure drop |
| Max Working Pressure | 32 MPa | Do not exceed this limit |
| Normal Working Pressure | 14 MPa | Standard operating point |
| Hysteresis | < 3% | Mechanical feedback type |
| Resolution | < 0.5% | High precision control |
| Operating Temp | -29°C to 135°C | Watch for extreme cold starts |
| Seal Material | Fluorocarbon (FKM) | Compatible with phosphate esters |
| Pilot Stage | Dual Nozzle-Flapper | Highly sensitive to dirt |
| Output Stage | 4-Way Spool | Direct mechanical feedback |
| Actuator | Dry Torque Motor | Check coil resistance if faulty |
Product Introduction
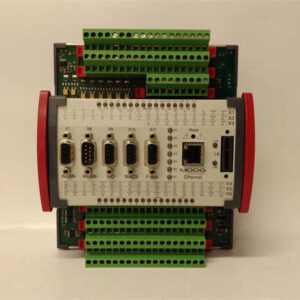
I’ve pulled more than my fair share of dead servo valves off turbine control decks, and the G771K202A is one I actually respect. It is a dual-nozzle flapper, two-stage valve with mechanical feedback, built specifically for heavy-duty power generation and high-pressure industrial hydraulics. It doesn’t rely on fragile internal electronics for position feedback; it uses a physical cantilever spring tube. When a turbine is shaking at 60 Hertz, that mechanical link keeps the spool tracking the command signal without drifting.Engineers specify this valve because it delivers 63 liters per minute of flow while maintaining a hysteresis of less than 3%. That is serious hydraulic muscle with tight control. Just keep in mind that the dry torque motor and the internal pilot filter screen are incredibly unforgiving. This valve is bulletproof against vibration, but it will choke to death if your fluid cleanliness drops below ISO 4406 14/11. Treat the oil right, and it will outlast the equipment it controls.

Quality SOP & Tech Pitfalls (The Reality Check)
The Lab Report (SOP)
Before we ship a G771K202A, it goes through a strict protocol. First, a visual and counterfeit check on the torque motor housing and spool cap. Next, it gets mounted on a live test rack to verify the 63 LPM flow curve and zero-shift under pressure. We check coil resistance with a Fluke 115 to ensure no internal shorts. Finally, we log the firmware/hardware revision, flush it with clean test fluid, and seal it in anti-static packaging. You get the test report with the valve.The Engineer’s Warning (Pitfalls)
The number one way I see these valves fail right out of the box is contamination during installation. The G771K series has a tiny, integrated pilot filter screen. If you flush your lines and push a chunk of Teflon tape or pipe scale into the valve, it will jam the flapper instantly. I once watched a plant spend three days troubleshooting a “faulty” new valve, only to find a piece of welding slag the size of a grain of sand wedged in the pilot stage. Never bypass the 10-micron absolute filter upstream. Also, always photograph the old valve’s zero-adjust screw position before pulling it. If you guess on the mechanical zero, you will be chasing null-shift errors for a week.
Installation & Configuration Guide
- Pre-Installation: ⚠️ Lock out and tag out the hydraulic power unit. Relieve all system pressure. Take a high-resolution photo of the old valve’s electrical connector pinout and the zero-adjustment screw setting.
- Removal: Label the A, B, P, and T ports immediately. Cap the ports on the manifold the second the old valve is off. Do not let the manifold sit open to the air.
- Installation: Copy the zero-adjustment screw setting from the old valve to the new one before mounting. This prevents 90% of startup alignment headaches. Torque the mounting bolts to OEM spec in a star pattern to prevent spool binding. Connect the electrical harness, ensuring the torque motor polarity is correct.
- Power-On & Testing: Verify 24V DC at the connector before plugging it in. Energize the system and let the oil circulate through the bypass for at least 15 minutes. Command a slow, full-stroke cycle while watching the LVDT feedback. Check for high-frequency chatter, which indicates air in the pilot line or a blocked filter screen.

Compatible Replacement Models
| Replacement Option | Model / Notes | Compatibility | Field Impact |
|---|---|---|---|
| ✅ Drop-in Replacement | G771K202A | 100% Hardware/Software Match | Direct swap. Copy zero-adjust screw. No logic changes. |
| ✅ Drop-in Replacement | G771K293A | Direct Upgrade | Newer revision. Same envelope and flow. Verify zero-adjust screw position. |
| ⚠️ Software Compatible | G771K200A | Same Series, Different Flow | Hardware mounts identically. Flow rating differs. Requires control loop tuning. |
| ❌ Hardware Mod Required | D633 / D661 Series | Different Architecture | Direct drive. Requires new mounting plate, wiring, and PLC logic rewrite. |
Frequently Asked Questions (FAQ)
Can I just swap this valve in without adjusting anything?
No. Even though it is a direct replacement, you must mechanically set the zero-adjustment screw to match the old valve. The spool land geometry varies slightly between individual valves. If you don’t set it, your actuator will drift at null.Is this valve sensitive to oil temperature?
Yes. The dual-nozzle flapper design relies on precise fluid viscosity. If your oil temperature swings wildly, you will see zero-shift. Keep your cooler working properly. I’ve seen valves act completely erratic just because the reservoir heater failed during a winter startup.What happens if my system gets contaminated?
The pilot filter screen will clog first. You will notice sluggish response or high-frequency oscillation (hunting) before the valve stops working entirely. Do not try to clean the internal screen yourself unless you have a certified cleanroom and a test bench. Send it to a MOOG-certified repair facility.Can I use standard hydraulic oil with this valve?
Check your seal material. The G771K202A typically comes with fluorocarbon (FKM) seals, which are designed for phosphate ester fire-resistant fluids (like those used in power plants). If you put standard mineral oil in an FKM-sealed valve, the seals will swell and destroy the spool clearance. Always verify the seal code on the nameplate.How do I know if the torque motor is burnt out?
Grab a multimeter and check the coil resistance across the electrical connector pins. It should be in the range of a few hundred ohms (check the specific OEM datasheet for the exact value). If you read an open circuit or a dead short, the coil is fried. Do not apply full current to test it; you will just melt the internal windings.Is this considered obsolete?
The G771K202A is an older industrial standard, but MOOG still supports it, and newer revisions like the G771K293A are fully backward compatible. You can still get brand-new surplus stock, but I highly recommend keeping a spare on the shelf. Lead times on these can stretch if the factory is backlogged.