 Tel:
 Email:
 WhatsApp:
Description
Key Technical Specifications
| Parameter | Value |
|---|---|
| Model Number | SC-TCMX01 |
| Part Number | 51307198-175 |
| Manufacturer | Honeywell |
| Module Type | I/O Module (signal conditioning / control) |
| Supply Voltage | 24 V DC |
| Operating Temperature | -20°C to +60°C |
| Enclosure Rating | IP20 (some listings claim IP65 — unverified) |
| Communication | Modbus (protocol list varies by source) |
| Signal Handling | Analog and digital I/O per reseller description |
| Mounting | Modular, panel/rack mount |
Product Introduction
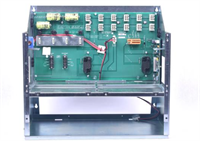
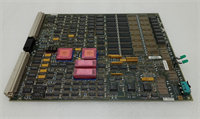
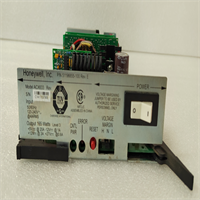
A plant in a coastal refinery lost a control loop during a monsoon week. Not because the process went bad — because an I/O card died and nobody had a spare. That’s the real market for something like the SC-TCMX01. It’s a Honeywell I/O module, part number 51307198-175, doing the unglamorous job of translating field signals into actions the controller can use. You’ll find these in process control panels, HVAC plants, and building automation where Honeywell’s footprint already exists.Engineers don’t pick this module because it’s exciting. They pick it because it matches an installed base, and because replacing a whole panel costs more than replacing one card. The published operating range of -20°C to +60°C on a 24 V DC supply is adequate for indoor panel work — but I’ve seen cards in that class fail early in cabinets where ambient hit 55°C in August with poor ventilation. My subjective note: this part number is notoriously ambiguous in the aftermarket. Buy from the nameplate, not from a website.
Quality SOP & Tech Pitfalls
The Lab Report (SOP)Every unit that leaves my bench goes through the same sequence:
- Visual / counterfeit check. Nameplate font depth, laser etch, PCB solder joints, any sign of reflow or board cleaning.
- Live test on test rack. 24 V DC applied, 24-hour soak, channels exercised with a calibrated signal source.
- Insulation and continuity. Fluke 115 for voltage/continuity, megger for isolation to spec.
- Firmware version logging. Read and record. Written into the shipping report.
- Anti-static sealing. ESD bag, desiccant, foam, labeled with serial.
No photos-only shipping. If I can’t show you a test record, I don’t sell it.The Engineer’s Warning (Pitfalls)Pitfall 1 — Part number confusion. Two different model numbers (SC-TCMX01 and SC-UCMX01) are being sold under the same part number 51307198-175 by different resellers. I’ve seen a buyer order “the spare,” receive a module that physically fit the slot, and then spend three days chasing a config mismatch. Photograph your old card’s nameplate. Send the photo. Don’t send a typed part number.Pitfall 2 — No config backup before the swap. Field disaster, real: a technician pulled a suspect I/O card on a Saturday night without photographing the jumper block or exporting the module configuration. The replacement arrived. The jumpers didn’t match. The loop stayed in manual for 14 hours because nobody could reconstruct the original scaling. Take the picture. Export the config. Both take ninety seconds.
Installation & Configuration Guide
Phase 1 — Pre-Installation (⚠️)
- Notify operations. Put the loop in manual or bypass per your MOC procedure.
- ⚠️ Isolate power to the slot/rack. Confirm 0 V with a meter — not with the panel LED.
- Wait for capacitor discharge (30 s minimum, 60 s if in doubt).
- ⚠️ Photograph everything: nameplate, wiring terminals, jumper/DIP block, slot position.
Phase 2 — Removal
5. Label each wire with the terminal number before loosening anything.
6. Release DIN rail clips or slot retainers evenly — don’t pry with a screwdriver against the PCB.
7. Pull straight out. Note any corrosion or burnt terminals on the backplane.Phase 3 — Installation
8. Copy the jumper/DIP settings from your photo onto the new module BEFORE seating it. This single step prevents roughly 90% of startup failures.
9. Seat the module fully until the retainer clicks.
10. Re-verify torque and terminal seating against your photo.Phase 4 — Power-On & Testing
11. Restore power. Confirm 24 V DC at the module input terminals.
12. Watch the LED boot sequence — compare against the OEM manual’s normal pattern.
13. Download/verify the configuration. Confirm the module comes online with no fault codes.
14. Exercise the loop: force a known input, confirm the output responds, then return to automatic with operations’ sign-off.
Compatible Replacement Models
| Model | Compatibility | Notes |
|---|---|---|
| SC-TCMX01 (same P/N) | ✅ Drop-in Replacement | Exact match. Price varies widely by channel — quotes I’ve seen range from ~126 to ~9,999 for the same part number. |
| SC-UCMX01 51307198-175 | ⚠️ Software Compatible / Verify | Same part number, different model prefix in reseller data. Requires config review and possibly a recompile. Estimate 4–8 hours engineering time. |
| Full panel / controller upgrade | ❌ Hardware Mod Required | Only worth it if you’re retiring the platform anyway. Don’t do it as a failure workaround. |
Frequently Asked Questions (FAQ)
“Can I hot-swap this safely?”
Not without checking first. If your rack has a redundant slot or the loop is non-critical, maybe. If it’s a single-module slot feeding a live control loop, no — put the loop in manual, isolate power, and swap it properly. Hot-swapping an unverified module into a running panel is how you turn a 1-hour job into a 10-hour incident.“Is this new or used?”
Honest answer: for a discontinued part number like this, assume surplus or pull-from-service unless the supplier shows you factory-sealed packaging with a matching date code. Ask for the date code. If they can’t provide one, it’s not factory sealed.“Why is the price so different between suppliers?”
Because the aftermarket for obsolete Honeywell I/O is unregulated. One listing shows ~126, another ~9,999 for what’s labeled the same part. The gap is condition, channel depth, and how much risk the seller is pricing in. Get three quotes and demand test records with each.“Will my existing configuration load onto a replacement?”
Usually yes — if it’s truly the same model and revision. But firmware revisions differ, and a config built on an older revision can throw scaling or timeout faults on a newer board. Export the config, record the firmware version of the old card, and compare before you energize.“What if it fails after I install it?”
Then you troubleshoot properly instead of blaming the card. Check supply voltage ripple, terminal corrosion, and backplane condition first. I’ve had “bad cards” returned that were fine — the real problem was a 26 V supply with 3 V of ripple. That said, if the module is within warranty, the supplier should test it and replace or refund.“Do you have the OEM manual?”
I don’t have a Honeywell-issued datasheet for SC-TCMX01 in hand, and I won’t pretend otherwise. The OEM hardware manual for your specific Experion or panel platform has the final say on pinouts, torque values, and LED codes. Get it through your Honeywell account or authorized integrator.Source transparency: No official Honeywell datasheet for SC-TCMX01 51307198-175 was found. Specifications derive from reseller listings, which conflict — the same part number appears under both SC-TCMX01 and SC-UCMX01 with differing descriptions. Verify all parameters against the physical nameplate and OEM documentation before purchase.