

 Tel:
Tel:  Email:
  WhatsApp:
 Description
Key Technical Specifications
- Analog Inputs: 8 channels (voltage and current signals)
- Analog Outputs: 4 channels
- Safety Integrity Level: SIL 3 (IEC 61508)
- Enclosure: Compact metal housing
- Operating Temperature: -20°C to +60°C (extended range variant)
- Communication: Safe Ethernet (SSL encrypted)
- Programming Support: FBD, SFC, Structured Text (ST)
- Processor: High-performance embedded CPU
- Protection: Conformal coated electronic components
- Reset Function: Hardware reset button for IP/account defaults
Product Introduction
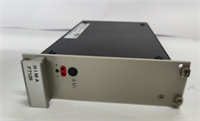
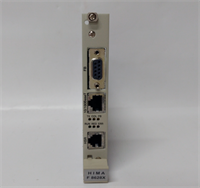
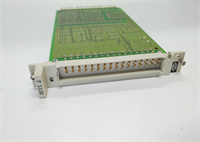
HIMA F3AIO 8/4 01 is a compact safety-related remote I/O module engineered for critical industrial process control. It monitors analog sensor data and executes necessary safety measures to protect personnel and equipment during emergencies.Field deployments show this module securely transmits input values over safe Ethernet networks to connected controllers. Its metal enclosure and conformal coating allow reliable operation in harsh environments, maintaining system integrity even when individual processing channels experience faults.
Installation & Configuration Guide
Preparation (10 min)
- Lock out and tag out (LOTO) all associated field devices.
- Verify incoming power supply matches the module’s specified working voltage.
- Gather required tools: insulated screwdrivers, multimeter, ESD wrist strap.
Removal (5–10 min)
- Disconnect all field wiring from the existing module.
- Take a high-resolution photo of the DIP switch and jumper settings before removal. (I once spent hours trying to recall a custom hardware revision index because I skipped this step.)
- Unclip the module from its mounting base.
Installation (10 min)
- Wear an ESD wrist strap grounded to the control panel chassis.
- Seat the new F3AIO 8/4 01 module firmly onto the base.
- Match the DIP switch and jumper configuration exactly to your photo record.
- Reconnect all terminal wiring according to the OEM schematic.
Power-On & Test (10 min)
- Restore power and observe the module’s status LEDs.
- Connect via safe Ethernet to verify communication handshake.
- Run the built-in self-test to confirm all 8 AI and 4 AO channels respond correctly.
- If a hardware reset was performed, reconfigure the IP address and system ID.
Troubleshooting Quick Reference
- Module fails to power on: Check the working voltage at the terminal block. Measure with a multimeter. Probability of bad power supply: 70%.
- Safe Ethernet communication fails: Verify SSL certificate handling and IP configuration. Check for physical cable damage. Probability of network misconfiguration: 60%.
- Erratic analog readings: Inspect field sensor wiring for ground loops or EMI interference. Probability of external noise: 50%.
- Module locked out after reset: Did you press the physical reset button? This forces IP and admin accounts to factory defaults. Probability of accidental reset: 80%.
- Firmware mismatch error: The connected HIMA controller may require a specific firmware revision. Verify the FW Rev index on the module nameplate against OEM documentation.

Dimensions, Mounting & Wiring Notes
- Dimensions: Compact form factor (Verify exact H×W×D with OEM mechanical drawing prior to panel cutout).
- Mounting Method: DIN rail or panel mount via metal enclosure brackets.
- Terminal Notes: Use ferrules on stranded wire. Ensure wire insulation is within 2 mm of the terminal clamp to prevent exposed copper shorts. Conformal coating requires careful stripping if field modifications are necessary.
FAQ
Can I swap an F3AIO 8/4 01 with a standard F3 DIO module?
No. The F3AIO handles analog signals (voltage/current), while the F3 DIO handles digital inputs and outputs. Mixing them will break your safety logic.I pressed the reset button by accident. What now?
Don’t panic. The reset clears the IP address, system ID, and disables all non-default accounts. You will need to reconfigure the network parameters and restore user access via the engineering software.Do you test these safety modules before shipping?
Yes. Every unit undergoes a 24-hour load test on a dedicated safety system simulator. We provide a test report showing verified I/O response times and safe communication stability.What is the lead time if you are out of stock?
Typically 4 to 6 weeks for New Surplus inventory. Expedited sourcing is available for emergency plant shutdowns.Is there a warranty on New Surplus safety parts?
We provide a 12-month functional warranty. This covers manufacturing defects and internal component failures under normal operating conditions.How do I prevent ESD damage during installation?
Always ground yourself to the control panel chassis before touching the module. Store the unit in its anti-static bag until the exact moment of installation.Can this module be used in explosive atmospheres?
Check the compliance marks on the module nameplate. While the metal enclosure provides physical protection, intrinsic safety or explosion-proof certifications depend on the specific hardware revision and installed barriers. Always verify with the OEM datasheet.