
 Tel:
Tel:  Email:
  WhatsApp:
 Description
Key Technical Specifications
| Parameter | Specification |
|---|---|
| Part Number | 469-P5-HI-A20-E |
| Phase CT Rating | 5 A Secondary (Standard) |
| Control Power | 70-265 VAC / 90-300 VDC |
| Frequency | 48-62 Hz |
| Analog Outputs | 4 channels (4-20 mA) |
| Communication | RS-232 (Front), RS-485 (Modbus/DNP3) |
| RTD Inputs | Supports Stator Temperature Monitoring |
| Display | 40-character LCD with LED indicators |
| Operating Temp | -20°C to +60°C |
| Mounting | Flush/Panel Mount (Draw-out case) |
| Protection Class | IP54 (Front Panel) |
| Certifications | UL, CSA, CE, IEC 60255 |
Product Introduction
The GE SR469 469-P5-HI-A20-E is a dedicated motor management relay designed to protect medium-voltage induction motors from electrical and thermal stress. It combines advanced protection algorithms—such as thermal modeling and jam/stall protection—with real-time metering capabilities. This unit features an “Enhanced” front panel, providing a local interface for diagnostics without needing a laptop.In operational terms, this relay acts as the primary safeguard against costly downtime caused by motor failure. The “P5” designation confirms it is configured for 5 A current transformer inputs, a standard in industrial power distribution. Field experience suggests paying close attention to the “E” suffix; it denotes the enhanced display which significantly speeds up troubleshooting during maintenance windows compared to older LED-only models.
Installation & Configuration Guide
Preparation (10 min)
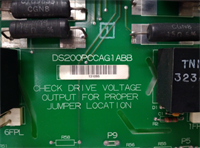
Ensure the control power is disconnected before handling. Verify the model number matches your one-line diagram, specifically checking the “P5” (5 Amp CT) rating. If replacing an old unit, take a photo of the rear wiring connections or obtain the schematic.
Removal (5–10 min)
The unit uses a draw-out chassis mechanism. Loosen the captive screws on the front bezel. Gently pull the handle to slide the module out of the case. Do not force it; if it sticks, check that the locking lever is disengaged.
Installation (10 min)
Slide the new module into the chassis until the rear connectors mate firmly. Tighten the front screws to ensure proper grounding of the chassis. Connect the RS-232 port if you are uploading settings via PC, or prepare to use the keypad.
Power-On & Test (10 min)
Apply the auxiliary control voltage (check terminals for 125 VDC or 240 VAC depending on your plant standard). The LCD should illuminate. Navigate to the “Status” menu to verify the phase currents read near zero (if motor is off) or match the ammeter (if running).
Troubleshooting Quick Reference
| Symptom | Probable Cause | Corrective Action |
|---|---|---|
| Blank Display | Auxiliary power missing or blown fuse | Check control power fuses F1/F2. Measure voltage at supply terminals. |
| “CT Mismatch” | Primary/Secondary injection mismatch | Verify S2 system setup page settings match actual CT ratios. |
| Relay Won’t Reset | Latched trip condition active | Check “Trip History”. Clear fault log via keypad or software. |
| Comm Error | Baud rate mismatch | Ensure connected PC/SCADA matches the relay’s 9600/19200 baud setting. |
Dimensions, Mounting & Wiring Notes
- Dimensions: Standard 19-inch rack mount compatible (with optional rack kit).
- Mounting: Designed for flush panel mounting using the draw-out case.
- Wiring: Use #8 ring lugs for high-current terminals. Control wiring typically utilizes 14-18 AWG stranded wire.
- Note: The RS-232 port on the front is strictly for local service; do not connect long-distance cables here.
FAQ
Q: What is the difference between P1 and P5 in this model?
A: It refers to the Current Transformer (CT) input rating. “P5” means the relay expects a 5 A secondary signal from your main CTs. “P1” would be for 1 A secondaries. They are not interchangeable without changing the field CTs.Q: Can I communicate with this using Modbus?
A: Yes. The rear RS-485 port supports Modbus RTU and DNP3 protocols. You will need to configure the slave ID and baud rate via the front panel or EnerVista software.Q: My old unit died, can I just swap this in?
A: Physically, yes, it slides right in. However, you must upload your previous settings file (.469 extension) to the new unit. Without the specific configuration data (motor FLA, service factor, etc.), the relay will likely nuisance trip or fail to operate.Q: Does the “E” at the end matter?
A: Yes. “E” stands for Enhanced Front Panel. It includes the text LCD screen and more buttons. Non-E models might only have basic LEDs. For maintenance, you definitely want the E version.Q: How do I test the ground fault function?
A: You can inject a current into the Ground CT input (usually terminals 13/14) while the motor is stopped. Use the “Test” menu to simulate a trip and verify the output relays activate.