 Tel:
Tel:  Email:
  WhatsApp:
 Description
Key Technical Specifications
| Parameter | Specification |
|---|---|
| Part Number | P0926TL |
| Protocol | PROFIBUS DPV1 / PA |
| Ports | 2 x Electrical Isolated Channels |
| Max Data Rate | 12 Mbit/s (Auto-sensing) |
| Device Capacity | Up to 125 Slaves per port (with repeaters) |
| Data Throughput | Max 244 bytes input / 244 bytes output per slave |
| Power Input | 24 VDC (Nominal), typically draws ~10W |
| Redundancy | Hot-swappable, supports redundant pairs |
| Isolation | Channel-to-System isolation (prevents ground loops) |
| Mounting | DIN Rail or Panel Mount (via Terminal Assembly) |
Product Introduction
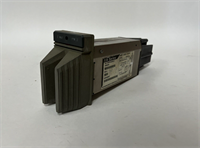
If you are running a Foxboro Evo system, you know that getting data from the field into the controller without dropping packets is half the battle. The FBM222 (P0926TL) is the workhorse for this. It’s not fancy, but it handles the heavy lifting of PROFIBUS communication.In the field, we use this module to talk to motor drives, remote I/O blocks, and valve positioners. What makes the FBM222 stand out is the dual-port architecture. You can run two completely separate networks, or set it up for redundancy so if one cable gets chewed by a rat or severed during maintenance, the other keeps the process alive. It supports DPV1, which means it handles diagnostics better than the older Class 1 masters. It’s reliable, provided you don’t mess up the termination.
Quality SOP & Tech Pitfalls (The Reality Check)
The Lab Report (SOP)
When we receive an FBM222 back from the field or get a surplus unit, here is the protocol before it goes back on a critical node:
- Visual Inspection: Check for “fried” traces near the terminal block connectors—signs of arcing or moisture ingress.
- Bench Test: Power up 24V DC. Watch the LEDs. If the “COM” light blinks red/green rapidly, the firmware might be corrupt.
- Loopback Test: Connect a known-good PROFIBUS tester (or a slave device) to both ports. Verify the controller sees the GSD file.
- Firmware Check: Ensure the firmware version matches the rest of the system. Mixing revisions on redundant pairs is a recipe for a “Bad Match” fault.
The Engineer’s Warning (Pitfalls)
Here is where people get burned with the FBM222: Termination and Addressing.PROFIBUS is incredibly sensitive to impedance mismatches. The most common failure I see isn’t the card dying; it’s the network going unstable because someone forgot to set the termination resistor switch on the last device in the line. Also, the FBM222 uses software addressing, but if you are using the physical terminal assemblies (TA), ensure the shielding is grounded correctly. I once spent three days chasing a “ghost” communication error that turned out to be a loose shield clamp causing EMI noise from a nearby VFD.
Installation & Configuration Guide
Swapping this card is straightforward, but follow these steps to avoid a headache.
- Pre-Installation ⚠️
- Safety First: While the FBM222 is hot-swappable, standard safety protocols apply. Lockout/Tagout if you are touching the wiring.
- Backup: Save your current logic/database.
- Documentation: Take a photo of the DIP switches (if applicable on the TA) and the wiring order.
- Removal
- Disconnect the PROFIBUS cables (mark them “Port 1” and “Port 2”).
- Release the locking mechanism on the carrier/module.
- Slide the module out gently. Don’t yank it; the backplane pins are fragile.
- Installation
- Insert the new FBM222 into the slot. Push until the rear connector seats firmly.
- Re-connect the PROFIBUS cables. Note: Ensure the purple/green wire orientation matches the standard (A/B).
- Tighten the locking screws/clips.
- Power-On & Testing
- Apply power. The LED should turn Green (Run).
- Go to the engineering workstation. The module status should change from “Offline” to “Online.”
- Force a scan or wait for the heartbeat. If it stays “Comms Fail,” check your termination resistors immediately.
Compatible Replacement Models
If you need to swap this out or migrate, here is the landscape:
- ✅ Drop-in Replacement: FBM222 (P0926TL). This is the standard 2-port Profibus module.
- ⚠️ Legacy Hardware: FBM223 (P0917HD). Older revision. Physically similar but may have different firmware requirements or lower data handling capabilities. Do not mix in a redundant pair without checking compatibility matrices.
- ❌ Different Protocol: FBM224 (P0926GG). This looks identical but is for Modbus. Do not buy this thinking it does Profibus.
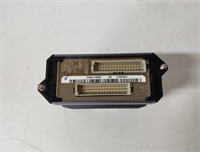
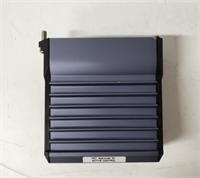
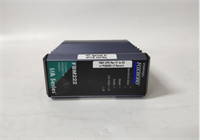
FBM222 FOXBORO
Frequently Asked Questions (FAQ)
Can I hot-swap the FBM222 while the system is running?
Yes, the Foxboro I/A Series architecture supports hot-swapping. However, if you pull the only module managing a critical set of valves, those valves will go to their fail-safe state (or hold last value depending on config) while the card is out. Plan your outage accordingly.Why is my FBM222 flashing a red LED?
Usually a configuration mismatch or a broken bus cable. If the “Channel Fault” light is on, check the PROFIBUS cable continuity. If the cable is fine, verify the GSD files in your engineering station match the actual devices on the network.Does the P0926TL support Profibus PA?
Indirectly, yes. The FBM222 talks DP. To connect PA devices (like flow meters), you usually run a DP/PA coupler or link. The FBM222 sees the coupler as a DP slave.What is the max distance for the cables?
Standard PROFIBUS rules apply. Without repeaters, you are looking at roughly 100m to 1km depending on the baud rate. Since this module supports up to 12 Mbps, keep the cables short for high speeds. At 9.6 kbps, you can go much further.Is the P0926TH the same thing?
No. P0926TH is the Terminal Assembly (the plastic housing/wiring block that plugs into the bottom or side of the module). You need the TA to connect your field wires to the FBM222 card.SEO Titles