 Tel:
Tel:  Email:
  WhatsApp:
 Description
Key Technical Specifications
| Parameter | Specification | Notes |
|---|---|---|
| Output Voltage | 24 VDC | Nominal, adjustable via trim pot |
| Output Current | 10 Amps | Continuous rating |
| Power Rating | 240W / 360W | Depending on cooling/derating |
| Input Voltage (AC) | 100 – 240 VAC | Universal input range |
| Input Voltage (DC) | 110 – 150 VDC | Common station battery voltage |
| Frequency | 50 / 60 Hz | Standard grid frequency |
| Mounting Type | DIN-Rail (TS-35/7.5 or 15) | Standard industrial rail mount |
| Operating Temp | -25°C to +70°C | Derating applies above 60°C |
| Protection | Overload, Overvoltage, Short Circuit | Auto-recovery or latch (check manual) |
| Indicators | “DC OK”, “Overload” LEDs | Front panel status |
| Connections | Screw Terminals | Removable block for easy wiring |

Product Introduction
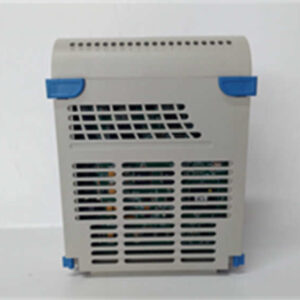
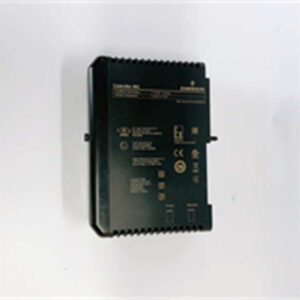
Finding reliable 24VDC power in a noisy industrial environment is harder than it looks. Most generic power supplies fry when the input voltage sags or the ambient temperature hits 60°C. The Emerson 1X00781H01L was built to solve exactly that problem for the Ovation and DeltaV control systems. It’s not just a converter; it’s a hardened power module designed to sit right next to your PLC processors on a DIN rail and deliver clean, stable juice.What makes this unit stand out is its dual-input capability. Whether you have standard 120VAC wall power or a 125VDC station battery backup, this module accepts both without needing a hardware swap. I’ve deployed these in wastewater treatment plants where the voltage fluctuates wildly, and they hold the 24V line steady within a fraction of a volt. It puts out a solid 10 amps, which is enough to run a substantial chunk of I/O cards or a cluster of smart transmitters. Just remember: at 10 amps, these things run hot. You need to leave space between modules for airflow, or they will thermal shutdown on you.
Quality SOP & Tech Pitfalls (The Reality Check)
The Lab Report (SOP)
We don’t trust “New in Box” blindly. Before this leaves our bench:
- Visual Inspection: We check the DIN rail clips. These plastic tabs get brittle if the unit sat in a hot warehouse for years. We also inspect the terminal block for corrosion.
- Live Load Test: We hook it up to an electronic load bank. We ramp it up to 8 Amps (80% load) and let it sit for 30 minutes. We verify the voltage stays locked at 24.0VDC ±1%.
- Ripple Check: Using an oscilloscope, we check the output ripple. If it exceeds 50mVpp, we reject it—dirty power kills sensitive sensors.
- Input Switching: We verify it boots up on AC, then switch to DC input to ensure the internal isolation diodes are working.
The Engineer’s Warning (Pitfalls)
- The “DC OK” Relay Trap: This module has a “DC OK” relay contact (often used for remote alarm monitoring). A lot of technicians wire this wrong, assuming it’s a dry contact powered by the loop. It’s not—it’s a physical relay inside. If you overload that tiny relay contact with too much current, it welds shut, and you lose your alarm capability.
- Field Disaster Story: I saw a contractor install five of these side-by-side in a small enclosure with no ventilation. He didn’t account for mutual heating. About two hours after startup, the middle three units went into thermal protection mode one by one. The whole panel lost 24V, tripping the process. Always respect the derating curve—if the cabinet is hot, you can’t pull the full 10 amps.
Installation & Configuration Guide
Swapping this unit is straightforward if you respect the torque specs.
- Pre-Installation Safety
- ⚠️ Disconnect Power: Lock out the main breaker. Even though the input might be low voltage AC, the DC bus capacitors can hold a charge. Wait 2 minutes after power down before touching terminals.
- Rail Prep: Ensure your DIN rail is grounded. This module relies on the rail for noise reduction and safety grounding.
- Removal (If replacing)
- Label every wire. Take a photo. Then take another photo.
- Release the terminal block if removable, or loosen screws carefully.
- Use a flathead screwdriver to release the bottom clip. Pull the bottom of the unit away from the rail first.
- Installation
- Hook the top of the 1X00781H01L onto the DIN rail. Snap the bottom into place until you hear a click.
- Torque Check: Tighten the terminal screws to the spec (usually around 0.5-0.6 Nm). Loose connections cause arcing and heat.
- Connect the Input (L/N or +/-) and Output (+/-). Double-check polarity on the output.
- Power-On & Testing
- Apply input power. You should see the green “DC OK” LED light up immediately.
- Measure the output voltage at the terminals with a multimeter. Adjust the trim potentiometer (if accessible) to exactly 24.0VDC. Do not rely on the label.
Compatible Replacement Models
| Compatibility | Model Number | Notes |
|---|---|---|
| ✅ Drop-in Replacement | 1X00781H01L (Various Revs) | Different firmware/date codes of the same model. Fully interchangeable. |
| ⚠️ Functional Equivalent | Emerson OC24V240W | Similar form factor and specs (24V/10A). Check mounting dimensions and terminal pitch before swapping. |
| ⚠️ Upgrade Path | DeltaV KJ3001X1-BK1 | Newer generation DeltaV power supply. Higher efficiency, but may require different DIN rail spacing or adapters. |
| ❌ Not Compatible | Generic Mean Well S-240-24 | While electrically similar, it won’t mount to the specific Ovation rack背板 (backplane) connectors if used in a chassis configuration. |
Frequently Asked Questions (FAQ)
Q: Can I use this to replace my old Fisher Controls power supply?
Likely yes, provided the old one is a standard 24VDC DIN-rail unit. The 1X00781H01L is a universal replacement for many legacy Fisher and Rosemount power modules because of its wide input range. Just make sure your load doesn’t exceed 10 Amps.Q: What does the “Overload” LED mean?
It means you are drawing more than 10A, or there is a short circuit on your 24V lines. The supply will likely go into “hiccup mode” (cycling on and off) to protect itself. Disconnect your field wiring and see if the light goes out. If it does, you have a shorted cable or sensor in the field.Q: Is this module hot-swappable?
No. Unlike some specialized redundant power systems, this is a standalone brick. If you pull it while live, you will arc the terminals and drop power to whatever devices it feeds. Always kill the upstream breaker first.Q: My input is 24VDC. Can I use this as a booster?
No. This is a step-down (buck) converter. It needs an input voltage higher than 24V (like 110VDC or 120VAC) to generate a stable 24V output. Putting 24V into the input will result in roughly 22V at the output (minus diode drops), which isn’t enough for your control gear.Q: Does it support redundancy?
Not internally. To get redundancy, you need to buy two of these units and wire them through external diode modules (redundancy modules) or use a dedicated redundant power supply system like the Emerson RPS series.