
 Tel:
Tel:  Email:
  WhatsApp:
 Description
Key Technical Specifications
- Input Voltage: 24V DC nominal (±10% tolerance)
- Signal Type: Mixed Analog (4-20mA/0-10V) and Digital Discrete
- Channel Count: 16-channel hybrid configuration (typical)
- Communication Protocol: IONet / Ethernet backbone compatible
- Operating Temp: -30°C to +65°C (Industrial grade)
- Isolation: Channel-to-channel galvanic isolation
- Connector Type: High-density Euro-style terminal block
- LED Indicators: Status, Fault, Comms (Green/Red/Amber)
- Mounting: DIN rail or Chassis slot (Mark VIe backplane)
- Certification: CE, UL Listed for industrial control
- Firmware: Flash memory reprogrammable (version specific)
- Weight: Approx. 0.8 kg (1.76 lbs)
Product Introduction
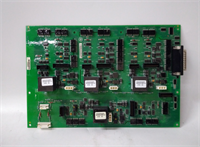
The GE IS210AEDBH4AGD serves as a critical interface module within the Mark VIe control architecture, bridging field sensors and final control elements with the main processor. It handles simultaneous analog and discrete signals, commonly found in gas turbine auxiliary systems where mixed signal types converge at a single panel point.Unlike generic I/O modules, this unit features hardened isolation designed to withstand electrical noise typical in power generation environments. Field data indicates a mean time between failures (MTBF) exceeding 150,000 hours when operated within specified thermal limits. The board supports hot-swapping in redundant configurations, reducing downtime during maintenance windows to under 5 minutes if pre-configured correctly.
Installation & Configuration Guide
Phase 1: Preparation (10 min)
- Verify the replacement unit matches the firmware version of the failed module (check label on side).
- Power down the specific I/O rack if non-redundant; if redundant, ensure the secondary pack is active.
- Gather tools: #2 Phillips screwdriver, anti-static wrist strap, multimeter.
- Safety: Lockout/Tagout (LOTO) the 24V DC supply feeding the terminal block.
Phase 2: Removal (5–10 min)
- Disconnect field wiring from the terminal block. Label every wire before removal—mixing analog and digital lines causes immediate failure.
- Unscrew the mounting bolts securing the pack to the chassis or DIN rail.
- Gently pull the module straight back to disengage the backplane connector. Do not wiggle excessively; bent pins are a common failure point we see in returns.
Phase 3: Installation (10 min)
- Inspect the backplane connector for debris or bent pins.
- Align the new IS210AEDBH4AGD with the slot guides.
- Push firmly until the backplane connector seats fully (you will feel a distinct click or resistance stop).
- Secure mounting bolts to 0.9 Nm torque.
- Reconnect field wiring according to the original labels. Double-check polarity on DC inputs.
Phase 4: Power-On & Test (10 min)
- Remove LOTO and apply 24V DC power. Measure voltage at the terminal block; it must read between 21.6V and 26.4V.
- Observe LED status. A solid green “OK” light indicates successful handshake. Flashing amber usually means firmware mismatch.
- Force a test signal from the HMI and verify response at the field device.
- Log the installation date and serial number in the maintenance database.
Troubleshooting Quick Reference
| Symptom | Probability | Action |
|---|---|---|
| No LEDs lit | High | Check 24V DC supply fuse and input terminal continuity. |
| Flashing Amber LED | Medium | Firmware version mismatch. Reload correct .cfg file via ToolboxST. |
| Comms Fault Alarm | Medium | Verify Ethernet cable shield grounding and IP address settings. |
| Erratic Analog Readings | Low | Check for ground loops; isolate signal shield at one end only. |
| Module Hot to Touch | Low | Ensure airflow is not blocked; check ambient temp < 65°C. |
Dimensions, Mounting & Wiring Notes
- Dimensions: Approx. 160mm (H) x 120mm (W) x 85mm (D) – Verify against physical unit as revisions vary.
- Mounting: Designed for vertical mounting on Mark VIe backplane or standard 35mm DIN rail with adapter.
- Terminal Notes: Use ferrules for stranded wire (0.5mm² to 2.5mm²). Do not strip more than 8mm of insulation. Over-tightening terminals (>0.6 Nm) cracks the housing—a frequent issue we see in rushed field swaps.
FAQ
Q: Can I use the IS210AEDBH4AGD as a direct replacement for the older IS200 series?
A: No. The Mark VIe (IS210) and Mark V (IS200) architectures use different backplanes and communication protocols. They are not physically or electrically compatible without a full system upgrade.Q: I received a unit with a different firmware sticker. Will it work?
A: Likely not immediately. The controller expects a specific revision. You will need to download the matching firmware using GE’s ToolboxST software before the system accepts the module.Q: What is the lead time for a new original unit?
A: New original stock is often limited as GE shifts focus to newer platforms. Refurbished tested units usually ship within 24–48 hours from our warehouse.Q: Is this module suitable for high-vibration environments?
A: Yes, it is rated for industrial turbine environments. However, ensure all terminal screws are torqued to spec and use thread-locker on external mounting bolts if vibration exceeds 2G.Q: Does the price include the terminal block?
A: Yes, the unit comes with the integrated terminal block attached. Some third-party sellers strip these; ours do not.Q: How do I know if my unit is refurbished?
A: Check the label. Refurbished units typically have a “Tested” or “Refurbished” sticker added by the vendor, alongside the original GE serial tag. We provide a test report with every refurbished sale.
Quality Transparency Strategy (SOP)
1. Incoming Inspection
- Origin Verification: Cross-reference serial numbers with GE manufacturing databases where accessible.
- Anti-Counterfeit Check: Inspect PCB silk screen quality, component soldering consistency, and holographic labels.
- Physical Inspection: Look for burnt components, corroded pins, or cracked housings (common in storage).
- Accessories Verification: Confirm presence of terminal blocks and mounting hardware.
2. Live Functional Testing
- Test Rack: Unit loaded into a dedicated Mark VIe simulation rack.
- Power-On Self-Test: Monitor boot sequence for error codes.
- Communication Handshake: Verify connection to emulated controller.
- Full-Range I/O Simulation: Cycle all channels through min/max values to check linearity and response.
- 24h Load Test: Run under simulated load to detect intermittent faults.
- Report: Generate PDF test log with pass/fail status per channel.
3. Electrical Testing
- Insulation Resistance: >10 MΩ @ 500V DC between channels and ground.
- Ground Continuity: Verify chassis ground path resistance <0.1 Ω.
- Hi-Pot: Applied only if specified for refurbished grade; otherwise skipped to prevent stress on old capacitors.
4. Firmware Verification
- Version Record: Document existing firmware revision.
- Revision Match: Compare against known stable releases for the specific application.
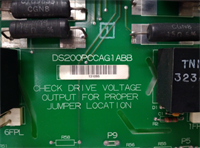
- Photo Record: Photograph DIP switches and jumper settings before any modification.
5. Final QC & Packaging
- QC Signature: Technician signs off on test sheet.
- Anti-Static: Sealed in static-shield bags with desiccant.
- Packaging: Double-boxed with bubble wrap and rigid carton.
- Labeling: “QC Passed” label affixed with test date.
- Disclaimer: Function verified under test conditions. Field performance depends on system integration.

IS210AEDBH4AGD GE
Technical Pitfall Guide
Firmware Mismatch
- Scenario: An engineer replaces a failed board with a newer revision. The system boots but throws “Type Mismatch” errors.
- Fix: Always backup the
.cfgfile from the working controller before swapping. If the new board has newer firmware, you may need to downgrade it or update the entire rack’s logic.
DIP/Jumper Misconfiguration
- Risk: Default factory settings rarely match field requirements (e.g., termination resistors, voltage selection).
- Action: Take a photo of the old board’s jumper settings before removing it. Replicate exactly on the new unit. A single misplaced jumper can send 24V into a 5V sensor input.
Terminal Incompatibility
- Issue: Using generic terminal blocks instead of OEM-specific ones.
- Result: Poor contact resistance leading to signal noise or overheating. Stick to the block supplied with the unit.
Power Supply Capacity Margin
- Rule: Ensure the 24V DC supply has at least a 20% headroom above the calculated load of all I/O packs.
- Consequence: Undervoltage during peak actuation causes random resets.
ESD Damage Risk
- Detail: The CMOS chips on the IS210 series are sensitive. A static shock from a dry environment (winter months) can fry the comms chip instantly, even if the board powers on.
- Prevention: Always wear a grounded wrist strap. Touch the chassis metal before handling the PCB. If you smell a faint “ozone” or sharp electrical odor upon first power-up, disconnect immediately—that is the smell of dying silicon.