
 Tel:
Tel:  Email:
  WhatsApp:
 Description
Key Technical Specifications
| Parameter | Specification |
|---|---|
| System Compatibility | Speedtronic Mark VIe (Simplex & TMR) |
| Output Type | Electromechanical Relay (Form-C / SPDT) |
| Channel Count | 16 Independent Outputs |
| Contact Rating | 5 A resistive @ 250 V AC / 30 V DC |
| Coil Voltage | 24 V DC (Nominal) |
| Insulation Resistance | >10 MΩ @ 500 V DC |
| Dielectric Strength | 1500 V AC for 1 minute |
| Operating Temperature | -30°C to +65°C (-22°F to +149°F) |
| Storage Temperature | -40°C to +85°C (-40°F to +185°F) |
| Humidity Range | 5% to 95% (Non-condensing) |
| Mounting | DIN Rail or Mark VIe Backplane |
| Protection | Conformal Coating (Class H) |
Product Introduction
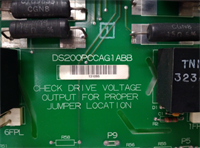
The IS200SRLYH2A serves as the primary interface for discrete control signals within the GE Speedtronic Mark VIe turbine control system. It converts low-voltage logic commands from the VCMI or VPRO processors into high-current physical actions, driving solenoids, alarms, and auxiliary motors directly.Field data indicates this revision (H2A) offers improved contact stability over earlier versions, specifically reducing contact bounce during rapid cycling events. Units undergo a 24-hour load test at 80% rated capacity to verify coil integrity; we reject any board showing >5% deviation in pull-in voltage. This ensures reliable operation even in high-vibration gas turbine environments.
 Installation & Configuration Guide
 Installation & Configuration Guide
Phase 1: Preparation (10 min)
- Verify the target rack slot matches the system configuration file (.CFG).
- Gather tools: #2 Phillips screwdriver, anti-static wrist strap, multimeter.
- Critical: Photograph existing DIP switch settings and jumper positions on the faulty board before removal. One wrong setting later causes logic inversion.
- Inspect the new IS200SRLYH2A for shipping damage; check connector pins for bending.
Phase 2: Removal (5–10 min)
- De-energize the control panel if possible. If live, wear appropriate PPE (arc flash suit).
- Disconnect all field wiring from the terminal block. Label every wire clearly.
- Unscrew the mounting hardware securing the board to the rack.
- Gently pull the board straight out. Do not rock it side-to-side; this damages the backplane connector.
Phase 3: Installation (10 min)
- Align the new IS200SRLYH2A with the guide rails and backplane connector.
- Push firmly until the board seats completely. You should feel a distinct “click” or resistance stop.
- Re-install mounting screws. Torque to 15 in-lbs (do not overtighten).
- Replicate the DIP switch and jumper configuration exactly from your photos. Double-check this step.
Phase 4: Power-On & Test (10 min)
- Reconnect field wiring. Ensure tightness (pull test gently).
- Apply 24 V DC control power. Measure voltage at the terminal; it must be 24 V ±10%.
- Observe the status LEDs. A steady green “OK” light indicates successful self-test.
- Force a test output via the HMI or toolbox software. Listen for the audible click of the relay.
- Measure voltage across the output contacts to confirm switching action.
Troubleshooting Quick Reference
| Symptom | Probability | Immediate Action |
|---|---|---|
| Relay clicks but no output voltage | High (80%) | Check field fuse or external power supply to the load. The board is likely fine. |
| “Board Fault” LED red | Medium (50%) | Reseat the board. If persistent, check backplane pin continuity. |
| Intermittent operation | Medium (40%) | Inspect terminal screw torque. Vibration often loosens connections over time. |
| Multiple channels failed | Low (20%) | Verify common 24 V DC supply rail. A dropped supply affects all coils. |
| Logic inverted (On=Off) | Low (10%) | Check DIP switches. This is the most common post-install error. |
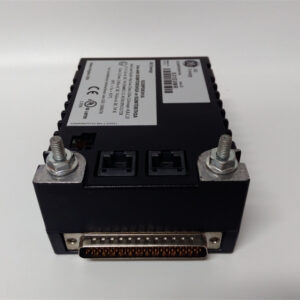
Dimensions, Mounting & Wiring Notes
- Dimensions: Approx. 160 mm (H) x 120 mm (W) x 40 mm (D). Exact depth varies with connector protrusion.
- Mounting: Designed for standard Mark VIe vertical racks. Requires specific retention clips (supplied with rack).
- Wiring: Use 14–18 AWG stranded copper wire. Strip length: 7 mm (0.28 in).
- Terminal Block: Detachable pluggable terminal block (PTB). Allows pre-wiring off-panel.
- Note: Keep high-voltage AC wiring separated from low-voltage DC logic wires within the conduit to prevent induced noise.
FAQ
Q1: Can I use IS200SRLYH2A to replace an older H1A version?
Yes, the H2A is generally backward compatible for hardware, but you must verify the firmware revision. In one plant upgrade, skipping the firmware check caused a 4-hour delay while engineers recompiled the logic. Always check the .CFG file requirements first.Q2: Is this board new or refurbished?
We stock both “New Surplus” (factory sealed, old date code) and “Refurbished” (tested by us). The product page specifies which one you are buying. Both come with the same 12-month functional warranty. Refurbished units save budget without sacrificing reliability.Q3: What happens if I connect 120 V AC to the 24 V DC coil terminals?
You will destroy the board instantly. The coil driver circuitry cannot handle AC voltage. We once saw a technician mix up the L1/N lines with the DC control lines—the resulting smoke smelled like burnt phenolic resin. Double-check your multimeter before energizing.Q4: How do I know if the relay contacts are worn out?
Measure contact resistance while the relay is energized. It should be <50 mΩ. If you read >1 Ω, the contacts are pitted or oxidized. Replace the board. Don’t try to clean them; the coating makes disassembly impractical.Q5: Do you provide a test report with the purchase?
Yes. Every unit ships with a printed QC sheet showing insulation resistance values (>10 MΩ), coil resistance measurements, and a pass/fail status for the 24-hour load test. It’s signed by the testing engineer.Q6: What is the lead time for bulk orders?
Stock items ship within 24 hours. For orders over 10 units, allow 3–5 days for additional testing and configuration verification. We don’t rush bulk shipments; we’d rather test twice than have you deal with a batch failure.