 Tel:
Tel:  Email:
  WhatsApp:
 Description
Key Technical Specifications
| Parameter | Specification |
|---|---|
| System Compatibility | GE Speedtronic Mark VIe |
| Primary Application | Generator Excitation Control |
| Logic Supply Voltage | 24 V DC (Range: 18–32 V DC) |
| Communication Protocol | Ethernet (UDP/TCP), I/O Packet |
| Redundancy Support | Triple Modular Redundant (TMR) architecture |
| Operating Temperature | -30 °C to +65 °C |
| Storage Temperature | -40 °C to +85 °C |
| Relative Humidity | 5% to 95% (Non-condensing) |
| Processor Type | 32-bit RISC (Specifics vary by firmware revision) |
| Mounting Interface | Backplane connector (Mark VIe standard) |
| Certification | UL, CSA, CE (Dependent on specific build date) |
| Firmware Requirement | Must match system ToolboxST project version |
Product Introduction
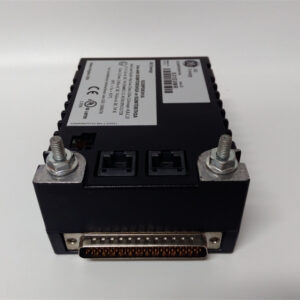
The IS200EDCFG1A serves as the dedicated excitation control board within the GE Mark VIe turbine control platform. It interfaces directly with static excitation systems to regulate generator voltage and reactive power output during startup and synchronization.Field data indicates this module reduces voltage regulation response time to under 50 milliseconds in standard configurations. Its design supports Triple Modular Redundancy (TMR), ensuring that a single board failure does not trip the generator. This capability is critical for maintaining grid stability during transient events.
Installation & Configuration Guide
Phase 1: Preparation (10 min)
Gather a static-safe workspace. Verify the replacement board’s firmware revision matches the existing system project file in ToolboxST. Check the backplane slot for bent pins—this happens more often than admitted. Have a 24 V DC power supply ready for bench testing if possible.Phase 2: Removal (5–10 min)
Power down the control cabinet if hot-swapping is not approved for your specific configuration. Disconnect all field wiring from the terminal block, not the board itself. Unscrew the retention mechanism. Pull the board straight out. Do not wiggle it excessively; the backplane connectors are fragile.Phase 3: Installation (10 min)
Align the new IS200EDCFG1A with the guide rails. Push firmly until the backplane connector seats fully. You should feel a distinct click or resistance stop. Secure the retention screws. Reconnect field wiring to the terminal block, ensuring torque specs match the manual (usually 0.5–0.7 Nm).Phase 4: Power-On & Test (10 min)
Apply 24 V DC power. Watch the status LEDs immediately. A solid green “OK” light is good; flashing amber usually means a firmware mismatch. Connect the Engineering Workstation (EWS). Verify communication handshake. Run a forced I/O test to confirm output signals reach the exciter bridge.
Troubleshooting Quick Reference
| Symptom | Probability | Immediate Action |
|---|---|---|
| No LEDs lit | High | Check 24 V DC supply at the board terminals. Measure for >18 V. Verify fuse integrity. |
| Amber LED flashing | Medium | Firmware version mismatch. Compare board revision with ToolboxST project settings. |
| Communication Timeout | Medium | Inspect Ethernet cable shielding. Check IP address conflicts in the network config. |
| Output Signal Missing | Low | Verify terminal block wiring tightness. Test continuity from board pin to field device. |
| System Trip on Insertion | Low | Backplane short or bent pin. Remove board immediately. Inspect connector visually with a flashlight. |
Dimensions, Mounting & Wiring Notes
- Dimensions: Approx. 160 mm (H) x 220 mm (D) (Depth includes connectors). Width fits standard Mark VIe slot.
- Mounting: Slides into designated rack slot; secured by two front-panel screws.
- Wiring: Uses separate terminal blocks for field I/O. Do not route high-voltage AC wires parallel to low-voltage DC signal lines to prevent noise induction. Shield grounds must connect at one end only (typically the cabinet ground bar).
FAQ
Q: Can I use this board in a Mark V system?
No. The IS200EDCFG1A is designed exclusively for the Mark VIe architecture. The backplane connectors and communication protocols differ significantly from Mark V. Attempting to force fit or adapt it will damage the hardware.Q: I bought a “refurbished” unit. How do I know it’s safe?
We perform a full SOP inspection. This includes incoming anti-counterfeit checks, a 24-hour load test on a dedicated Mark VIe rack, and insulation resistance testing (>10 MΩ @ 500V). We also photograph the DIP switch settings before shipping. It’s not a guess; it’s verified data.Q: What happens if the firmware doesn’t match?
The board will likely flash an amber fault LED and refuse to join the redundancy group. The system won’t crash, but that specific channel will be disabled. Always download the correct firmware from your project file before putting it into service.Q: Is there a minimum order quantity?
No. We ship single units for emergency repairs. Bulk orders (5+) qualify for volume pricing. Payment terms vary; credit cards work for small orders, while wire transfer is standard for larger procurement contracts.Q: How long does shipping take?
Stock items ship within 24 hours. Domestic US delivery typically takes 2 days via express courier. International shipments vary by customs clearance but usually arrive within 5–7 business days.Q: Does this support hot-swapping?
Technically, the Mark VIe backplane supports it, but we strongly advise against swapping excitation boards while the generator is online unless you have full TMR redundancy active and validated. One wrong move can drop the voltage regulator. Play it safe: schedule a brief window if possible.Q: What if it fails during my testing?
Contact us immediately. If the failure occurs under normal test conditions (correct voltage, no shorts), we replace it under our 12-month warranty. We cover the return shipping cost for verified defects.
Quality Transparency Strategy (SOP)
1. Incoming Inspection
We trace the origin of every IS200EDCFG1A. Our team performs visual anti-counterfeit checks, looking for re-marked chips or inconsistent laser etching. We inspect the PCB for heat discoloration or repaired traces. All accessories, like mounting screws or terminal blocks, are counted and verified.2. Live Functional Testing
Each board goes onto a dedicated Mark VIe test rack. We run a power-on self-test (POST). The system performs a communication handshake with the Engineering Workstation. We simulate full-range I/O signals to verify input reading and output driving. Finally, the unit runs under a 24-hour continuous load. A test report is generated for each serial number.3. Electrical Testing
We measure insulation resistance between logic ground and chassis; it must exceed 10 MΩ @ 500V. Ground continuity is checked to ensure safety paths are intact. If applicable, a Hi-pot test verifies dielectric strength without damaging components.4. Firmware Verification
Technicians record the exact firmware version and document revision. We backup the current DIP switch and jumper configurations. Photos are taken of these settings to include in the shipping packet. This prevents “it worked yesterday” confusion.5. Final QC & Packaging
A senior engineer signs off on the QC checklist. The board is sealed in an anti-static bag. We wrap it in thick bubble wrap and place it in a rigid carton. A “QC Passed” label with the date and technician ID is affixed to the box. Function is verified under test conditions; field results may vary based on system health.
Technical Pitfall Guide
- Firmware Mismatch: A plant in Texas once installed a board with an older firmware rev. The system recognized the hardware but refused to execute the control logic, causing a delayed startup. Fix: Always compare the board’s sticker revision with your ToolboxST project file before installation.
- DIP/Jumper Errors: These small switches set the board address. If you change them incorrectly, the controller talks to the wrong device. Rule: Take a high-resolution photo of the original board’s jumpers before removing it. Double-check the new board against that photo.
- Terminal Incompatibility: Sometimes newer terminal blocks have slightly different pin spacing or locking mechanisms. Check: Physically compare the old and new terminal blocks before cutting any wires. Don’t force them.
- Power Supply Margin: Excitation boards draw significant current during transients. If your 24 V DC supply is already loaded to 90%, adding a new board could cause a voltage dip and reset the whole rack. Requirement: Ensure at least 20% headroom on the power supply.
- ESD Damage: Static electricity kills these boards silently. You might install it, and it works for a week before failing. Protocol: Wear a grounded wrist strap. Touch the cabinet frame before handling the board. Never touch the component leads directly.