
 Tel:
Tel:  Email:
  WhatsApp:
 Description
Key Technical Specifications
| Parameter | Value |
|---|---|
| Network Protocol | GE Genius Bus (Global Data) |
| Max Blocks Supported | 32 Genius I/O Blocks per RCM |
| Communication Speed | 152 Kbaud (fixed) |
| Data Exchange | Up to 128 bytes Global Data per block |
| Fault Tolerance | Supports redundant RCM configuration (with kit) |
| Status Indicators | OK, COMM, FAULT LEDs per channel/group |
| Power Consumption | 1.2 A @ 5V DC (backplane) |
| Operating Temp | 0°C to 60°C (32°F to 140°F) |
| Isolation | 1500VAC between bus and backplane |
| Cable Type | Twisted Pair Shielded (Belden 9463 or equivalent) |
| Max Distance | 7500 ft (2300 m) at 152 Kbaud (with repeaters) |
| Dimensions (HxWxD) | 12.7 x 5.1 x 15.2 cm (approx.) |
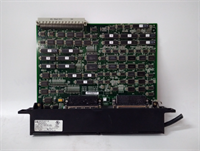
Product Introduction
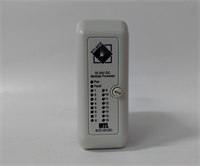
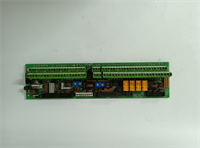
The IC687RCM711 enables the GE 90-70 PLC CPU to communicate with distributed Genius I/O blocks located remotely from the main rack. It offloads I/O scanning from the CPU, allowing for faster logic execution and modular system design.This module manages the token-passing protocol on the Genius bus, ensuring deterministic data updates from up to 32 remote blocks. It supports “Global Data” exchanges, allowing PLCs to share data directly without CPU intervention. (Field technicians value the detailed LED diagnostics which pinpoint exactly which block on the daisy-chain has failed communication.)

Installation & Configuration Guide
Phase 1: Preparation (10 min)
- Ensure main rack power and field power to I/O blocks are OFF. Lockout/Tagout (LOTO).
- Verify slot assignment. The RCM can be placed in any slot except the CPU slot (Slot 1), though slots near the CPU are preferred for speed.
- Check DIP switch settings for baud rate (usually fixed at 152 Kbaud for this model) and station address if applicable.
- Inspect the DB9 communication port pins for bending or corrosion.
Phase 2: Removal (5–10 min)
- Disconnect the Genius bus cables (A, B, Common) from the DB9 connector. Label them “In” and “Out” if daisy-chaining.
- Loosen the two captive mounting screws securing the module to the rack.
- Pull the module straight out. Support the weight; do not let it hang by the backplane connector.
- Real-world detail: If the DB9 connector housing is cracked, replace the connector before reusing the cable harness to prevent intermittent signal loss.
Phase 3: Installation (10 min)
- Align the module with the rack guides. Slide it in firmly until the backplane connector seats.
- You must feel solid resistance when fully seated. Visual check: no gap between module face and rack.
- Tighten mounting screws to 1.2 Nm. Loose mounting causes vibration damage to the backplane pins.
- Reconnect Genius bus wiring. Ensure shield drain wires are grounded at one end only (typically the RCM end).
- Terminate the bus correctly. The last device on the chain MUST have a 150-ohm termination resistor installed.
Phase 4: Power-On & Test (10 min)
- Apply rack power first, then field power to remote I/O blocks.
- Observe LEDs: PWR (Green), OK (Green after POST). COMM LED should flash or turn solid green depending on traffic.
- If FAULT LED is red, check the specific block status via the PLC software (Proficy Machine Edition).
- Force a table update in the software. Verify all 32 potential block addresses show “Good” or “Present” as configured.
- Toggle a remote output and verify the physical action. Then toggle a remote input and verify the PLC status bit changes.
Troubleshooting Quick Reference
| Symptom | Probability | Fastest Check | Action |
|---|---|---|---|
| FAULT LED Red | High | Termination Missing | Check the last device on the bus. Is the 150Ω terminator installed? |
| COMM LED Off/Red | High | Wiring Polarity | Swap A and B wires at the RCM. Genius is polarized; A must go to A. |
| Specific Block Fault | Medium | Block Power | Measure 24VDC at the failing remote I/O block. Check local fuse. |
| Intermittent Comm Loss | High | Shield Grounding | Check for ground loops. Ensure shield is grounded at ONE end only. |
| All Blocks Faulted | Low | RCM Config | Verify the GFK configuration table matches the physical block addresses. |
| High Scan Time | Medium | Too Many Blocks | Reduce the number of blocks per RCM or split the network with a second RCM. |
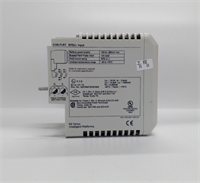
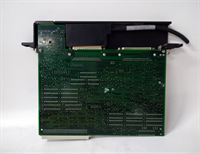
Dimensions, Mounting & Wiring Notes
- Dimensions: 127 mm (H) x 51 mm (W) x 152 mm (D).
- Mounting: Inserts directly into the 90-70 series rack backplane. Secured by two front-face screws.
- Terminal Notes: Uses a DB9 female connector. Pinout: Pin 3 (A+), Pin 4 (B-), Pin 5 (Common/Shield).
- Cabling: Use Belden 9463 or equivalent twisted pair shielded cable. Do not use standard Ethernet Cat5 unless verified for Genius protocol impedance.
- Termination: A 150-ohm, 1/2-watt resistor must be installed across A and B at the physical end of the line.
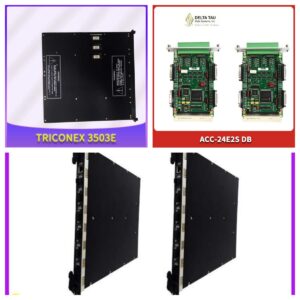
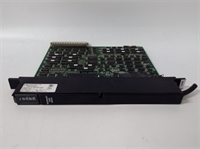
IC687RCM711 GE
FAQ
Q: How many remote I/O blocks can one IC687RCM711 handle?
A: It supports up to 32 Genius I/O blocks. If you need more, you must install a second RCM in another slot.Q: Can I mix Genius I/O blocks from different manufacturers?
A: No. The Genius protocol is proprietary to GE Fanuc. Only genuine GE Genius blocks (IC600, IC693, IC697 series) will communicate with this RCM.Q: My COMM light is flashing green slowly. Is that normal?
A: Yes, flashing green typically indicates active data transmission on the bus. Solid green might indicate no traffic or a specific mode depending on firmware revision. Refer to the GFK-0911 manual for exact LED states.Q: Do I need to terminate both ends of the cable?
A: No. Genius bus is a daisy-chain, not a multi-drop bus requiring dual termination. You only terminate the very last device in the chain. The RCM itself does not have an internal terminator.Q: What happens if the RCM fails in a redundant setup?
A: If configured with a redundant RCM pair (using the IC697ACC711 kit), the backup RCM will take over control within milliseconds, preventing a process stop.Q: Is this compatible with the newer PACSystems RX7i?
A: No. The RX7i uses different network modules (like the Genius Bus Controller for RX7i, IC698RMX016). The IC687RCM711 is strictly for the 90-70 backplane architecture.