 Tel:
Tel:  Email:
  WhatsApp:
 Description
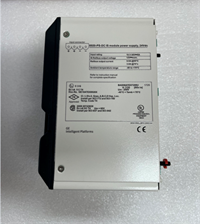
Key Technical Specifications
| Parameter | Specification | Notes |
|---|---|---|
| I/O Channels | 16 Universal | Configurable per channel |
| Logic Voltage | 24 VDC | Standard industrial control voltage |
| Analog Input | 0-10 V / 4-20 mA | User selectable |
| Analog Output | 0-10 V / 4-20 mA | Sourcing mode |
| Resolution | 12-bit | Standard for this generation |
| Accuracy | ±0.1% | Full scale |
| Max Current | 5 A | Per channel peak |
| Temp Range | -40°C to 70°C | Industrial grade |
| Protocol | Modbus / EtherNet/IP | Via backplane/adapter |
| Dimensions | 140 x 30 x 25 mm | Standard 90-30 footprint |
Product Introduction
Let’s be honest, the GE Series 90-30 platform is the “cockroach” of the automation world—it just refuses to die. I’ve seen these racks running in steel mills that were built before I was born, and they are still chugging along. The IC660ELB912G is a critical piece of that puzzle. It’s not just a simple digital card; it’s a universal module that saves you from having to buy separate analog and digital cards for small applications.The real value here is the flexibility. In the field, you rarely have the exact number of inputs and outputs you planned for during the design phase. This module lets you mix and match. With 16 channels and 12-bit resolution, it’s precise enough for temperature loops but fast enough for discrete counting. Just be careful with the revision; older firmware can be temperamental if you mix it with newer CPUs, but the hardware itself is bulletproof.
Quality SOP & Tech Pitfalls (The Reality Check)
The Lab Report (SOP)
Before we ship this out, we don’t just look at the box.
- Visual Inspection: We check the DIN rail clips. On these older GE modules, the plastic clips get brittle and snap if you look at them wrong. We ensure the locking mechanism is intact.
- Live Test: We rack it up in a Series 90-30 chassis. We verify that the module talks to the CPU without throwing “Bus Timeout” errors.
- Channel Verification: We inject a 4-20mA signal and a 24VDC logic signal to ensure the A/D converter isn’t drifting.
- Cleaning: It gets a bath in contact cleaner to remove decades of oil and dust.
The Engineer’s Warning (Pitfalls)
- The “Universal” Trap: Just because it’s “universal” doesn’t mean it auto-configures. If you don’t set the dip switches or software configuration correctly for the specific channel type (voltage vs. current), you will read garbage data.
- Ground Loops: I’ve seen these fry because the field wiring wasn’t isolated. If you are running analog signals over long distances without shielded cable, this module will pick up 60Hz noise like an antenna.
- Field Disaster: A guy at a water plant once blamed the module for “lying” about the tank level. Turned out he had the wiring for “sinking” but the module was set to “sourcing.” He spent three days troubleshooting code before checking the physical wiring. Don’t be that guy.
Installation & Configuration Guide
- Pre-Installation:
- ️ RACK POWER DOWN: Do not hot-swap this unless you are absolutely sure your backplane supports it (most older Series 90-30 racks do not).
- Take a photo of the existing wiring. Seriously. Do it now.
- Removal:
- Unscrew the terminal block. If the screws are stripped, use an extractor, don’t hack at it.
- Release the DIN rail latch at the bottom. It requires a flathead screwdriver to pry down gently.
- Installation:
- Copy Configuration: If you are replacing a bad unit, ensure the new module matches the slot configuration in the Logic Developer software.
- Seat the module firmly. You should hear a distinct click when the DIN rail latch engages.
- Re-wire carefully. Torque the terminals to spec (usually around 4-5 in-lbs). Overtightening strips the threads; undertightening causes arcing.
- Power-On & Testing:
- Apply 24VDC. Watch the LEDs.
- OK LED: Should be solid green.
- I/O LED: Should flash with activity.
- Force a value from the software to verify the physical output reacts instantly.
Compatible Replacement Models
| Compatibility | Model Number | Notes |
|---|---|---|
| Drop-in | IC660ELB912G | Exact match. Check firmware revision. |
| Drop-in | IC660ELB912H | Newer revision. Hardware compatible, may need firmware update. |
| ️ Software | IC693MDL645 | Different form factor (VersaMax), requires rewiring and logic change. |
| Incompatible | IC698CPE010 | This is a CPU, not an I/O module. Do not put this in a slot meant for I/O. |

Frequently Asked Questions (FAQ)
Q: Can I swap this while the PLC is running?
A: I wouldn’t risk it. The Series 90-30 backplane is old tech. Yanking a card live can cause a voltage spike that crashes the CPU. Take the 5 minutes to shut it down.Q: My module reads “0” even when there is signal. What gives?
A: Check your configuration in the PLC software. The software needs to know if the channel is set to Voltage or Current mode. If they don’t match, the data won’t scale.Q: Is this module expensive?
A: Not compared to a new CPU. You can usually find these for around $1,000 depending on the surplus market, which is cheap insurance compared to downtime.Q: Does it support high-speed counting?
A: It can handle basic pulses, but if you need serious high-speed counting, get a dedicated counter module. This is a generalist, not a specialist.Q: The LED is blinking red. Is it dead?
A: Not necessarily. A blinking red light usually means a configuration mismatch or a blown fuse on a specific channel. Check the fuses on the terminal strip first.