
 Tel:
Tel:  Email:
  WhatsApp:
 Description
Product Introduction
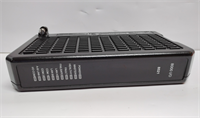
In the world of heavy industrial control, the GE DS200SI0CG1AEA is the unsung hero of the Mark V turbine control system. Often mistaken for just a generic “I/O card,” this component is the central nervous system for all analog signal processing. If the Mark V brain is the CPU, and the backbone is the core (R1/R2/R3), then the DS200SI0CG1AEA is the sensory cortex that translates the physical world into digital logic.This module, officially known as the TCQA board, sits inside the I/O core chassis and performs the critical task of “scaling” raw sensor data. It takes the messy, real-world signals—such as vibration readings, fuel pressure, or generator voltage—and conditions them into a format the controller can understand. It is the gateway for the turbine’s vital signs, ensuring that the control system receives accurate data to make split-second decisions.Unlike digital I/O cards that deal in “on/off” states, the TCQA handles the analog world. It is the interface for continuous variables like temperature, flow rate, and position. Without this board, the turbine would be blind to the subtle changes in its environment, making it an absolute necessity for any plant running legacy Mark V hardware.
Key Technical Specifications
| Parameter | Specification |
|---|---|
| Model Number | DS200SI0CG1AEA |
| Product Series | GE Mark V |
| Type | Analog I/O Module (TCQA) |
| Primary Function | Signal Conditioning & Scaling |
| Supported Signals | 4-20mA, LVDT, Vibration, Thermocouple, Voltage, Relay Output |
| Bus Interface | 3PL Bus (Core Bus Interface) |
| Key Interfaces | JE (Generator/Line Signals), TBQA (Thermocouple), TBQC (4-20mA) |
| Key Features | Hardware Jumpers for mA Range (20/200mA), RS232 Test Port |
| Form Factor | I/O Core Module (R1, R2, R3) |
Installation & Maintenance Guide
Phase 1: Safety & Preparation (15 Minutes)
- Power Down: Ensure the Mark V control panel is completely powered down and locked out to prevent electrical shock.
- Static Protection: Ground yourself using a wrist strap. Static electricity is the silent killer of these sensitive electronic modules.
- Inventory: Gather your tools (screwdrivers, tweezers for jumpers) and have a digital camera ready to document the current configuration.
Phase 2: Removal of Old Module (20 Minutes)
- Labeling: Before touching anything, take high-resolution photos of the current module’s hardware jumpers (J1, J2, J5, J6, J7, J8). Exact configuration is critical.
- Unplug: Carefully disconnect the 3PL and JE cables from the backplane. These are heavy-duty industrial connectors; pull straight out, not at an angle.
- Extract: Unscrew the retaining screws and gently slide the old TCQA board out of the chassis. Do not touch the circuit board itself with your fingers.
Phase 3: Installation of New Module (20 Minutes)
- Configure: Insert the DS200SI0CG1AEA into the empty slot. Using your photos as a reference, set the hardware jumpers exactly as they were on the old board. Pay special attention to the mA output range settings (J5/J6).
- Connect: Reconnect the 3PL and JE cables. Ensure they are fully seated and the locking tabs are engaged.
- Secure: Tighten the mounting screws to hold the module firmly in place against the backplane.
Phase 4: Power Up & Verification (30 Minutes)
- Visual Check: Before restoring power, do a final visual inspection. Ensure no solder joints are broken and no foreign debris is in the chassis.
- Power On: Restore power to the Mark V system.
- Indicator Lights: Observe the front panel LEDs. A steady green light usually indicates a successful power-on and self-test.
- Functional Test: Use the diagnostic software or front-panel interface to verify that the analog channels (e.g., 4-20mA inputs, LVDT readings) are within expected ranges. If using the RS232 test port (J7), run a loopback test to ensure the board is communicating over the 3PL bus.