 Tel:
Tel:  Email:
  WhatsApp:
 Description
Key Technical Specifications
- Product Type: Rack Mount Bracket Kit
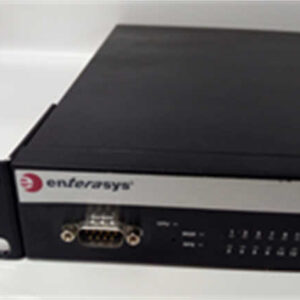
- Compatibility: Enterasys SecureStack I3H Series Switches
- Mounting Width: Standard 19-inch (482.6 mm) EIA-310-D compliant
- Material: Cold-rolled steel (typically 1.5mm – 2.0mm gauge)
- Finish: Black powder coat (standard for data center aesthetics)
- Fasteners Included: Cage nuts, washers, and mounting screws (M6 or 10-32 typically)
- Installation Type: Front-mount (1-post) or standard 2-post rack support
- Load Capacity: Rated for standard 1U/2U switch loads (approx. 5-10kg per pair)
Product Introduction
Let’s be honest: you usually don’t care about the mounting brackets until you’re dangling a $2,000 switch with one hand, trying to line up the screw holes with the other. The Enterasys I3H-RACK-MNT is the official hardware solution for securing your SecureStack I3H switches into a standard 19-inch cabinet. It sounds simple, but in the field, “simple” is what keeps your network gear from sliding out and snapping fiber cables.I’ve used plenty of third-party universal brackets, but there is something to be said for the OEM fit. These ears are punched specifically for the chassis mounting points of the I3H series, meaning you don’t have to force the metal or strip threads. It’s built from heavy-gauge steel, so it doesn’t flex when you torque down the screws. If you are deploying these switches in a high-vibration environment or a mobile rack, this kit is mandatory, not optional.
 Quality SOP & Tech Pitfalls (The Reality Check)
 Quality SOP & Tech Pitfalls (The Reality Check)
The Lab Report (SOP)
Since this is passive hardware, we don’t run firmware tests, but we do check for mechanical integrity:
- Visual Inspection: We check for bends or warping. If the bracket has been dropped and bent, it won’t seat flush against the rack rail, causing stress on the chassis.
- Hardware Verification: We verify the bag contains the correct cage nuts and screws. Nothing worse than getting to the install site and finding empty plastic bags.
- Coating Check: We inspect the powder coating for chips. Exposed metal rusts, and rust stains your expensive server cabinet.
The Engineer’s Warning (Pitfalls)
- The “Universal” Lie: Do not assume these brackets fit every Enterasys switch. The I3H chassis has specific recessed mounting points. I once tried to force a generic bracket onto a SecureStack chassis; I stripped the threads on the chassis itself, effectively bricking a perfectly good switch. Use the right tool for the job.
- Grounding: These brackets often provide the ground path to the rack. If you paint over the contact points or use nylon washers where you shouldn’t, you lose your ESD protection. Ensure metal-to-metal contact.
Installation & Configuration Guide
Phase 1: Preparation
- Verify Contents: Open the box. Ensure you have the left and right brackets (usually marked L/R) and the screw bag.
- Check Rack Type: Identify if your rack uses square holes (cage nuts) or threaded holes. The I3H-RACK-MNT usually comes with cage nuts for square-hole racks.
- ⚠️ Safety: If installing into a live rack, ensure the rack is stable and won’t tip over.
Phase 2: Bracket Attachment
- Align: Place the bracket against the side of the I3H switch chassis.
- Secure: Insert the screws into the chassis mounting holes. Hand-tighten first to avoid cross-threading.
- Torque: Use a screwdriver to secure the bracket. Do not overtighten; you can strip the chassis threads easily.
Phase 3: Rack Installation
- Insert Cage Nuts: Snap the cage nuts into the rack rail at the desired U-height.
- Lift and Seat: With a partner (these switches are awkward), lift the switch and slide the brackets onto the rack rails.
- Fasten: Insert the rail screws through the bracket holes into the cage nuts. Tighten securely.
Compatible Replacement Models
Since this is a mechanical part, “compatibility” is strictly physical.
- ✅ Direct Replacement: Enterasys I3H-RACK-MNT
- Verdict: The only guaranteed fit. Designed specifically for the I3H footprint.
- ⚠️ Universal Alternatives: Generic 19-inch 1U/2U Rail Kits
- Verdict: Use with caution. You must measure the depth of the I3H chassis and the location of the mounting holes. Generic rails often require “shelf” support if the screw holes don’t line up perfectly, which blocks airflow.
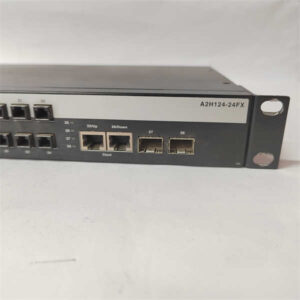
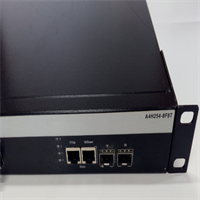
- ❌ Incompatible: Enterasys A-Series or C-Series Brackets
- Verdict: Do not attempt to use brackets from the A-Series (e.g., A2H124-24) or C-Series. The chassis depths and screw hole spacing are different.
Frequently Asked Questions (FAQ)
- Q: Does this kit come with the screws for the switch itself?
- A: Usually, yes. The OEM kit typically includes the screws to attach the ears to the switch and the cage nuts/screws for the rack. However, always verify the parts list before you climb the ladder.
- Q: Can I use these brackets for a non-Enterasys switch?
- A: Unlikely. The hole pattern is punched to match the I3H chassis specifically. Unless you have a switch with the exact same width and side-hole spacing, it won’t fit.
- Q: Is this a 1-post or 2-post mount?
- A: It is designed primarily for standard 2-post or 4-post racks (front and rear rails). It attaches to the front ears of the chassis. For heavy 4-post stability, you usually need additional rear support rails (often sold separately or included in full rail kits).
- Q: Will this fit a standard 23-inch telecom rack?
- A: No. This is designed for the industry-standard 19-inch (EIA-310) rack. If you are in an old-school telecom closet with 23-inch width, you will need adapter bars.
- Q: Are these brackets reusable?
- A: Yes. Steel brackets are durable. If you are decommissioning a switch, you can unscrew these and reuse them on a replacement I3H unit, provided you don’t strip the threads during removal.