 Tel:
Tel:  Email:
  WhatsApp:
 Description
Key Technical Specifications
| Parameter | Specification | Notes |
|---|---|---|
| System Length | 5.0 meters (16.4 feet) | Includes probe + cable + sensor |
| Probe Tip Diameter | 8 mm | Standard 3300 XL size |
| Sensitivity | 7.87 V/mm (200 mV/mil) | Nominal at 25°C |
| Temperature Range | -35°C to +260°C (-31°F to +500°F) | Standard high-temp rating |
| Linear Range | 2.0 mm (80 mils) minimum | Depends on target material |
| Target Material | AISI 4140 Steel | Calibration standard; requires compensation for other metals |
| Output Impedance | 1 kΩ | Proximitor sensor output |
| Supply Voltage | -17 VDC to -26 VDC | Typically -24 VDC nominal |
| Connector Type | ClickLoc® (Probe) / BNC or I/O (Sensor) | ClickLoc ensures secure mounting |
| Compliance | API 670 (5th Ed.), ISO 10816 | Meets petroleum/natural gas industry standards |
| Intrinsically Safe | Optional (depends on specific suffix) | Check certification label for ATEX/IECEx |
| Resolution | < 0.2 µm (< 8 µin) | Typical noise floor |
Product Introduction
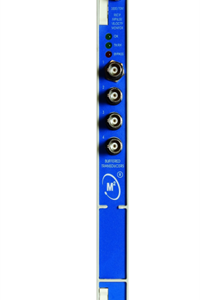
You don’t install vibration sensors because you want to; you install them because the last time a compressor bearing seized without warning, it took six weeks to get a replacement rotor. The Bently Nevada 330180-91-05 is the insurance policy against that nightmare. It’s the workhorse of the 3300 XL 8mm family, specifically built for the harsh reality of steam turbines, gas expanders, and large centrifugal compressors where temperatures spike and vibrations tell the only truth that matters.Engineers stick with this specific 5-meter configuration because it hits the sweet spot for cabinet routing without needing messy extension adapters that introduce noise. The real value here isn’t just the “high quality” marketing fluff; it’s the stability of the 200 mV/mil sensitivity across that massive -35°C to +260°C range. I’ve seen cheaper probes drift 10% just because the casing got hot, causing false trips. This unit, when grounded correctly, holds its calibration within 1% even after years of thermal cycling. Just a heads-up: the ClickLoc connector is fantastic for retention, but if you don’t have the specific wrench, you will strip the nut trying to tighten it with pliers. Don’t be that guy.
 Quality SOP & Tech Pitfalls (The Reality Check)
 Quality SOP & Tech Pitfalls (The Reality Check)
The Lab Report (SOP)
Before this leaves our bench, it goes through the wringer. First, visual inspection under magnification to ensure the ClickLoc threads aren’t cross-threaded and the epoxy seal on the probe tip is flawless—no bubbles, no cracks. Then, we mount it on a calibrated micrometer stand with a 4140 steel target. We sweep the gap from 0 to 100 mils while logging the output voltage on a Fluke 8846A multimeter to verify the linearity curve matches the OEM spec sheet within ±1%. We also perform a 500V DC insulation resistance test between the coil and the case; anything under 100 MΩ gets rejected immediately. Finally, we log the serial number and firmware revision (if applicable to the sensor) and seal it in an anti-static bag with desiccant. We can provide this test data sheet upon request.The Engineer’s Warning (Pitfalls)
Here is where projects go sideways. The most common failure I see isn’t the probe dying; it’s the cable capacitance mismatch. The 330180-91-05 is a matched system. The probe, the extension cable, and the proximitor sensor are calibrated together as a single unit. If you try to swap just the probe and use an old cable from a different batch, the resonant frequency shifts, and your vibration readings will be garbage. I once watched a plant shut down a $2M turbine because the maintenance crew mixed a 5m cable with a 9m probe thinking “it’s all Bently.” The system reported 0 mils vibration while the bearing was disintegrating. Also, check your DIP switches on the sensor rack card—if the full-scale range setting doesn’t match the probe sensitivity, your PLC logic will trip on normal startup transients. Take a photo of the old setup before you pull a single wire.
Installation & Configuration Guide
Phase 1: Pre-Installation
⚠️ STOP. Lockout/Tagout the machinery. Wait for the shaft to stop completely. Discharge any static electricity from your body. Before touching the old sensor, take a high-resolution photo of the existing wiring, the DIP switch settings on the proximitor card, and the exact gap voltage reading (if accessible). Note the target material; if it’s not 4140 steel, you need to calculate a compensation factor.Phase 2: Removal
Label every wire at both ends (probe side and I/O side). Do not trust color codes alone; they fade. Use the specific ClickLoc wrench to loosen the probe nut. If it’s stuck due to heat cycling, apply a small amount of penetrating oil, but keep it away from the connector pins. Gently pull the probe out; do not twist aggressively if it feels bound, or you might snap the brittle ceramic tip inside the bore.Phase 3: Installation
Clean the mounting hole thoroughly. Any metal burrs will ground the probe shield incorrectly and cause 60Hz/50Hz noise. Insert the new 330180-91-05 probe hand-tight. Crucial Step: Verify the mechanical gap. For most radial vibration applications, you want the probe positioned at the center of its linear range (usually around -10 VDC or -40 mils gap). Use a DC voltmeter on the output while adjusting the probe depth. Once the voltage is stable, torque the ClickLoc nut to the OEM specification (usually 40-50 in-lbs) using the proper tool. Connect the extension cable and sensor, ensuring the BNC/connectors click firmly.Phase 4: Power-On & Testing
Apply the -24 VDC supply. Watch the LED on the proximitor module. It should show “OK” or green status. Measure the DC gap voltage again; it should match your pre-installation target. Slowly roll the machine up to speed. Monitor the vibration spectrum. If you see huge spikes at 1x RPM that look impossible, check your grounding immediately. Download the baseline signature and compare it to historical data.
Compatible Replacement Models
 Compatible Replacement Models
| Compatibility Tier | Model Number | Details & Differences |
|---|---|---|
| ✅ Drop-in Replacement | 330180-91-05 | Exact match. Same 5m length, same temp rating, same sensitivity. No software changes needed. |
| ✅ Drop-in Replacement | 330180-91-00 (Standard Temp) | Identical electrically, but limited to +150°C (+302°F). Only use if your machine runs cool. Cheaper, but risky for steam turbines. |
| ⚠️ Software Compatible | 330180-92-05 (High Temp Extended) | 5m length, but rated to +350°C. Physically fits, but verify your monitor card supports the slightly different capacitance of the extended range version. May require recalibration. |
| ❌ Hardware Mod Required | 3300 XL 11mm System | Different probe diameter. Requires re-drilling the casing or using an adapter sleeve (not recommended for high-vibration apps). Avoid unless absolutely necessary. |
Frequently Asked Questions (FAQ)
Q: Can I hot-swap this probe while the turbine is running?
A: Absolutely not. While the electronics might survive, pulling a probe out of a pressurized or vibrating bearing housing is a recipe for disaster. You’ll lose the gap reference, likely damage the threads, and if the seal fails, you could leak lube oil everywhere. Shut it down. The 20 minutes you save isn’t worth the risk of a fire or bearing wipe.Q: My old probe was 4.5 meters. Will this 5-meter kit work?
A: Not directly without recalibration. The 3300 XL system relies on a specific total cable length to maintain the correct resonant frequency and sensitivity. Adding or subtracting length changes the system’s electrical characteristics. You must either order the exact length matching your original system configuration or re-calibrate the entire channel (probe + cable + sensor) as a new unit using a micrometer stand. Don’t just guess.Q: Does this come with the ClickLoc wrench?
A: Usually, no. The standard factory box includes the probe, cable, sensor, and mounting hardware (nuts/washers), but the specialized installation tool is often sold separately. Order the tool (Part # 178095 or similar) beforehand. Trying to install these with adjustable pliers is how you end up with rounded nuts and angry site managers.Q: What if my shaft isn’t 4140 steel?
A: The probe is calibrated for 4140 steel. If your shaft is stainless steel, aluminum, or a different alloy, the eddy current response changes. You will get a reading, but it will be inaccurate (often reading lower than actual vibration). You need to apply a material compensation factor found in the Bently Nevada manual, or better yet, send a sample of your shaft material to Bently for custom calibration if accuracy is critical.Q: How long is the warranty?
A: Standard is 1 year from shipment for manufacturing defects. However, these probes are fragile. If you drop it, crack the tip during install, or fry it with a welding ground nearby, that’s on you. We replace DOA (Dead on Arrival) units instantly, but field damage requires a failure analysis report. Keep your installation photos; they save lives during warranty claims.