 Tel:
Tel:  Email:
  WhatsApp:
 Description
Key Technical Specifications
| Parameter | Specification |
|---|---|
| Order Code | GJR5252100R0161 |
| Short Type | 07KT94 |
| Input Type | Current (Galvanically isolated per channel) |
| Input Range | 0 … 20 mA (Configurable via software/hardware) |
| Number of Channels | 8 Independent Inputs |
| Resolution | 12-bit (plus sign bit) |
| Conversion Time | Approx. 10 ms per channel (multiplexed) |
| Input Impedance | 50 Ω (Typical) |
| Isolation Voltage | 500 V AC (Channel to Bus) |
| Supply Voltage | 24V DC (from backplane) |
| Current Consumption | Approx. 150 mA @ 24V DC |
| Operating Temp | 0°C to +55°C |
| Mounting | AC 400 Series Rack / Backplane |
| Diagnostic Features | Wire break detection, Over-range indication |
Product Introduction
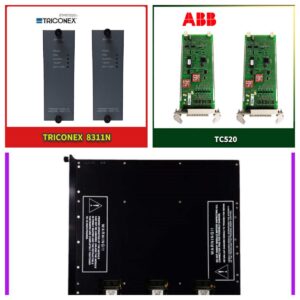
The ABB 07KT94 (GJR5252100R0161) is an 8-channel analog input module designed for the AC 400 control system, specifically engineered to interface current loop sensors (4-20mA or 0-20mA) in industrial environments. It converts analog field signals into digital values for the CPU, featuring individual channel isolation to prevent ground loops from corrupting data.In field deployments involving turbine monitoring and chemical dosing, this module maintains a linearity error of less than 0.1% of full scale across the operating temperature range. The galvanic isolation between channels and the system bus protects the central processor from high-voltage transients common in power plant switchyards. We perform a full-scale injection test on all 8 channels during refurbishment; any channel deviating by more than ±1 digit is recalibrated or rejected.
 Installation & Configuration Guide
 Installation & Configuration Guide
Phase 1: Preparation (10 min)
- Switch OFF the 24V DC supply to the AC 400 rack. Verify 0V at the bus terminals.
- Identify the target slot in the rack. Ensure it is configured for I/O modules, not additional CPU slots.
- Prepare your wiring diagram. Note the specific channel assignment for each sensor (CH1–CH8).
- Attach an ESD wrist strap to the cabinet ground. Analog components are highly sensitive to static discharge.
Phase 2: Removal (5–10 min)
- Label all existing wires connected to the front terminal block. Use permanent marker on tape.
- Loosen the terminal screws and carefully remove the field wiring. Do not pull hard; check for stuck strands.
- Release the module locking clip or screws.
- Slide the module out horizontally. Avoid touching the gold backplane pins.
Phase 3: Installation (10 min)
- Inspect the 07KT94 terminal block. Ensure no metal shavings or debris are present between screw contacts.
- Align the module with the rack guides. Push firmly until the backplane connector seats. Listen for the mechanical lock engagement.
- Re-connect field wiring according to your labels. Tighten screws to 0.5–0.6 Nm.
- Critical Check: Verify that no bare wire strands are bridging adjacent terminals. This causes short circuits on the 24V loop.
Phase 4: Power-On & Test (10 min)
- Restore 24V DC power.
- Observe the module status LEDs. A steady green “OK” LED indicates healthy internal logic.
- Connect the engineering workstation to the AC 400 CPU.
- Force a known current value (e.g., 12 mA) into Channel 1 using a signal generator.
- Monitor the raw integer value in the PLC memory. Expected value should match the scaled engineering unit within tolerance.
Troubleshooting Quick Reference
| Symptom | Probability | Action |
|---|---|---|
| “Wire Break” Alarm | High | Check sensor loop continuity. Measure resistance; open circuit > 1 kΩ triggers alarm. Verify 24V loop supply. |
| All Channels Read Zero | Medium | Check module 24V supply from backplane. Verify CPU configuration matches hardware layout. |
| One Channel Reads Max/Min | Medium | Sensor failure or wiring short. Disconnect field wire; if reading persists, module input stage may be damaged. |
| Noisy/Fluctuating Values | High | Ground loop issue. Check shield grounding (single point only). Verify isolation integrity between channels. |
| Module Not Detected | Low | Bad backplane contact. Reseat the module. Clean gold pins with isopropyl alcohol. |
Dimensions, Mounting & Wiring Notes
- Dimensions: 128 mm (H) × 85 mm (W) × 160 mm (D) including terminal block.
- Mounting: Exclusive to ABB AC 400 series racks. Requires secure locking to prevent vibration-induced disconnection.
- Terminal Notes: Uses removable screw terminal blocks. Wire size: 0.5 mm² to 2.5 mm² (AWG 20–14).
- Shielding: Connect cable shields to the DIN rail or grounding bar immediately upon entry to the cabinet. Do not leave shields floating.
- Heat Dissipation: Module surface temperature typically reaches 40°C under full load. Ensure 50mm vertical clearance for convection cooling.
FAQ
Q: Can I use this module for 4-20mA sensors?
Yes. The 07KT94 accepts 0-20mA hardware signals. You must configure the scaling in the AC 400 programming software to treat 4mA as the zero engineering unit and 20mA as full scale. The hardware does not distinguish between 0-20 and 4-20; it just reads the current.Q: My old module has suffix R0160. Is R0161 compatible?
Generally, yes. The R0161 is a later revision of the same functional board. However, always verify the firmware compatibility with your specific AC 400 CPU version. In 95% of field upgrades, they are direct plug-and-play replacements.Q: Why do I see random spikes on one channel only?
This usually indicates a compromised isolation barrier on that specific channel or a ground loop. Since channels are individually isolated, a fault on Ch1 shouldn’t affect Ch2. Check the sensor cable routing near VFDs or high-voltage lines.Q: Is the terminal block included?
Yes, the refurbished unit includes the original removable terminal block. If you have an existing block wired in your panel, you can swap the blocks without rewiring, provided the pinout matches (standard for this series).Q: How accurate is the “Refurbished” calibration?
We inject precision current sources (0%, 25%, 50%, 75%, 100%) into every channel. We adjust internal trim pots or flag digital offsets to ensure accuracy within ±0.1% of span. It is not “guesswork”; it is metrology-grade verification.Q: I don’t have the AC 400 programming cable. Can I test this alone?
No. The 07KT94 requires the AC 400 CPU to scan the inputs and make data available. It cannot output data independently. You need the full rack system or a portable test bench with a CPU to verify operation.Q: What happens if I connect a voltage source instead of current?
Do not do this. The input impedance is low (50Ω). Connecting a 24V voltage source directly will drive ~480mA through the input circuit, likely destroying the shunt resistor and input amplifier instantly. Only connect current loops.