Key Technical Specifications
- Module Type: Non-Isolated Digital Input/Output
- Input Channels: 8 (Dry or Wet Contact)
- Input Voltage: 24-48V DC
- Output Channels: 8 (Relay Contact)
- Output Rating: 2A @ 30V DC (Max)
- System Compatibility: Bently Nevada 3500 Rack
- Standard Compliance: API 670, IEC 61010-1
- Grounding: Shared Reference Point Required
- Load Protection: Snubber Circuit Required for Inductive Loads
- Mounting: 3500 Rack Slot
Product Introduction
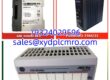
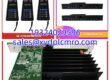
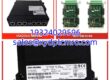
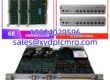
The BENTLY NEVADA 133819-02 serves as a critical interface within the 3500 Machinery Protection System, bridging field signals and rack logic. This non-isolated I/O module handles eight digital inputs and eight relay outputs, enabling direct control of solenoids or status monitoring via limit switches.Unlike isolated modules, this unit requires a common ground reference, which simplifies wiring but demands strict electrical discipline. We verify every BENTLY NEVADA 133819-02 against API 670 standards, ensuring relay contact resistance and input thresholds meet OEM specifications before shipment. (It’s a workhorse part, but treating it like an isolated module is a common field mistake.)
Installation & Configuration Guide
Preparation (10 min)
Verify the 3500 rack power is stable. Confirm your grounding scheme; since this is a non-isolated module, all connected devices must share the same ground potential. Gather a 24-48V DC source for input testing and a resistive load for output verification.Removal (5-10 min)
Locate the target slot in the 3500 rack. Engage the ejector levers and pull the module straight out. Do not wiggle side-to-side; backplane pins are fragile. Inspect the backplane connector for bent pins or carbon tracking immediately.Installation (10 min)
Align the BENTLY NEVADA 133819-02 with the guide rails. Push firmly until the ejector levers click into the locked position. Hand-tighten the front panel screws to ensure proper grounding through the chassis. Connect field wiring, ensuring no stray strands bridge adjacent terminals.Power-On & Test (10 min)
Restore rack power. Check the module status LED; it should be solid green. Force a digital output via the 3500 configuration software and measure voltage at the terminal. Cycle through all eight inputs with a 24V DC source to confirm LED indication and software state change.
Troubleshooting Quick Reference
| Symptom | Probable Cause | Action |
|---|---|---|
| Input LED Off, No Signal | Ground Loop / Potential Diff | ⚠️ High: Measure voltage between module GND and signal GND. Must be <1V DC. |
| Relay Clicks, No Load Action | Inductive Kickback Damage | Check snubber circuit. Replace relay if contacts are welded/open. |
| Intermittent Comm Errors | Backplane Pin Damage | Reseat module. Inspect backplane connector under magnification. |
| All Inputs Active | Shorted Input Common | Disconnect field wires. Measure resistance between input common and terminals. |
| Module Status LED Red | Internal Logic Fault | Power cycle rack. If persistent, replace BENTLY NEVADA 133819-02. |

Dimensions, Mounting & Wiring Notes
- Form Factor: Standard 3500 Series Module (19″ Rack Compatible)
- Mounting: Front panel screws + Backplane connector
- Terminal Type: Screw-clamp or Spring-clamp (Verify revision)
- Wiring Note: Keep signal cables separated from high-voltage power lines by min. 300mm.
- Torque Spec: 0.5 Nm (0.44 lb-ft) max for terminal screws.
- Grounding: Chassis ground via front panel screws is mandatory for non-isolated operation.
FAQ
Q: Can I use this for high-voltage AC switching?
No. The relay contacts are rated for 2A @ 30V DC max. Switching 120V AC directly will weld the contacts instantly. Use an interposing relay if you need to control AC loads.Q: I installed it and the LED is flickering. Is it bad?
Probably not the module. Flickering usually means a floating ground or noise on the 24V DC supply. I’ve seen this happen when the power supply ground wasn’t bonded to the rack chassis. Check your grounding first before RMA’ing the part.Q: Is this the same as the 3500/62?
No. The /62 is isolated. The 133819-02 is non-isolated. You cannot swap them without rewiring the entire grounding scheme. Verify your system design before ordering.Q: Do you test the relays before shipping?
Yes. We cycle every relay and measure contact resistance. We also verify input thresholds at 24V and 48V. You get a test report with the serial number.Q: My old module had a different suffix. Will this work?
The base part number 133819-02 is the key. Suffixes often denote revision or minor manufacturing changes. If the base number matches, it’s functionally identical. (But always double-check the physical connector type—some older revisions used different terminal blocks.)Q: What happens if I don’t use a snubber on the relay output?
You’ll get arcing. Eventually, the contacts will pit and fail open, or worse, weld shut and fail to de-energize the solenoid. For inductive loads, a snubber isn’t optional; it’s required for the module to survive more than a few months.Q: How long is the lead time?
If in stock, we ship same-day. If not, let me know your required date. We can often source from our network within 3-5 days. Don’t wait until the machine trips to check inventory.